
All family guides and offline activities
On this page
Start a Sprunki crochet project with the twenty-character colour chart, a materials checklist and a numbered practice body. The body is a general exercise for learning the shape; individual character details need their own pattern and a test sample. All of it, plus a page for each of the twenty characters, is also available as a 101-page printable book.
To be clear about what this page is. It is the official colour and shape reference, written by the company that owns the characters, plus a generic beginner pattern for the body. Individual character patterns are published separately as a community pattern by Anne R., and the round-by-round instructions below are the shared base rather than a replica of any one character.
All twenty characters in one PDF: a full-page reference plate and a pattern section for each, the colour index with hex values, the shared pattern with the photographed steps, horror-form notes, troubleshooting and a corrections page. The eighteen character adaptations are first drafts and have not been test crocheted; the book says so on every one of them. If a round does not come out the way it reads, tell us and we will fix the page and reprint the book.
What you need
- Start with your yarn label’s recommended hook, then try a smaller hook for a firm fabric. A 3 mm hook with worsted yarn or a 2.5 mm hook with DK can be a starting point; adjust to your tension so stuffing cannot show through.
- Yarn in the character's main colour, plus small amounts of white and black for details. Yardage has not been measured for this practice body; weigh your yarn before and after making a sample to plan a set.
- Toy stuffing, a tapestry needle, stitch markers, and scissors. Mark the first stitch of every round or you will lose your place by round four.
- Contrasting yarn for embroidered features. Avoid plastic eyes, glued details and small detachable parts on pieces intended for young children; the name “safety eyes” is not a safety guarantee.
The official colour chart
These are the colours and the features that make each character readable at a glance. Everything in the third column is what people recognise first, so it is worth spending your time there rather than on the body.
| Character | Colour | What makes it recognisable |
|---|---|---|
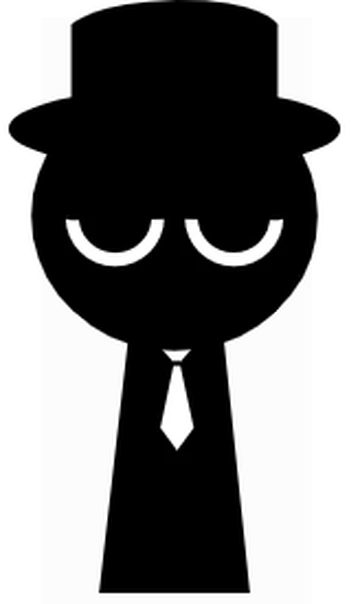 Black | Black with a white outline | Stark black silhouette, white edge, minimal face |
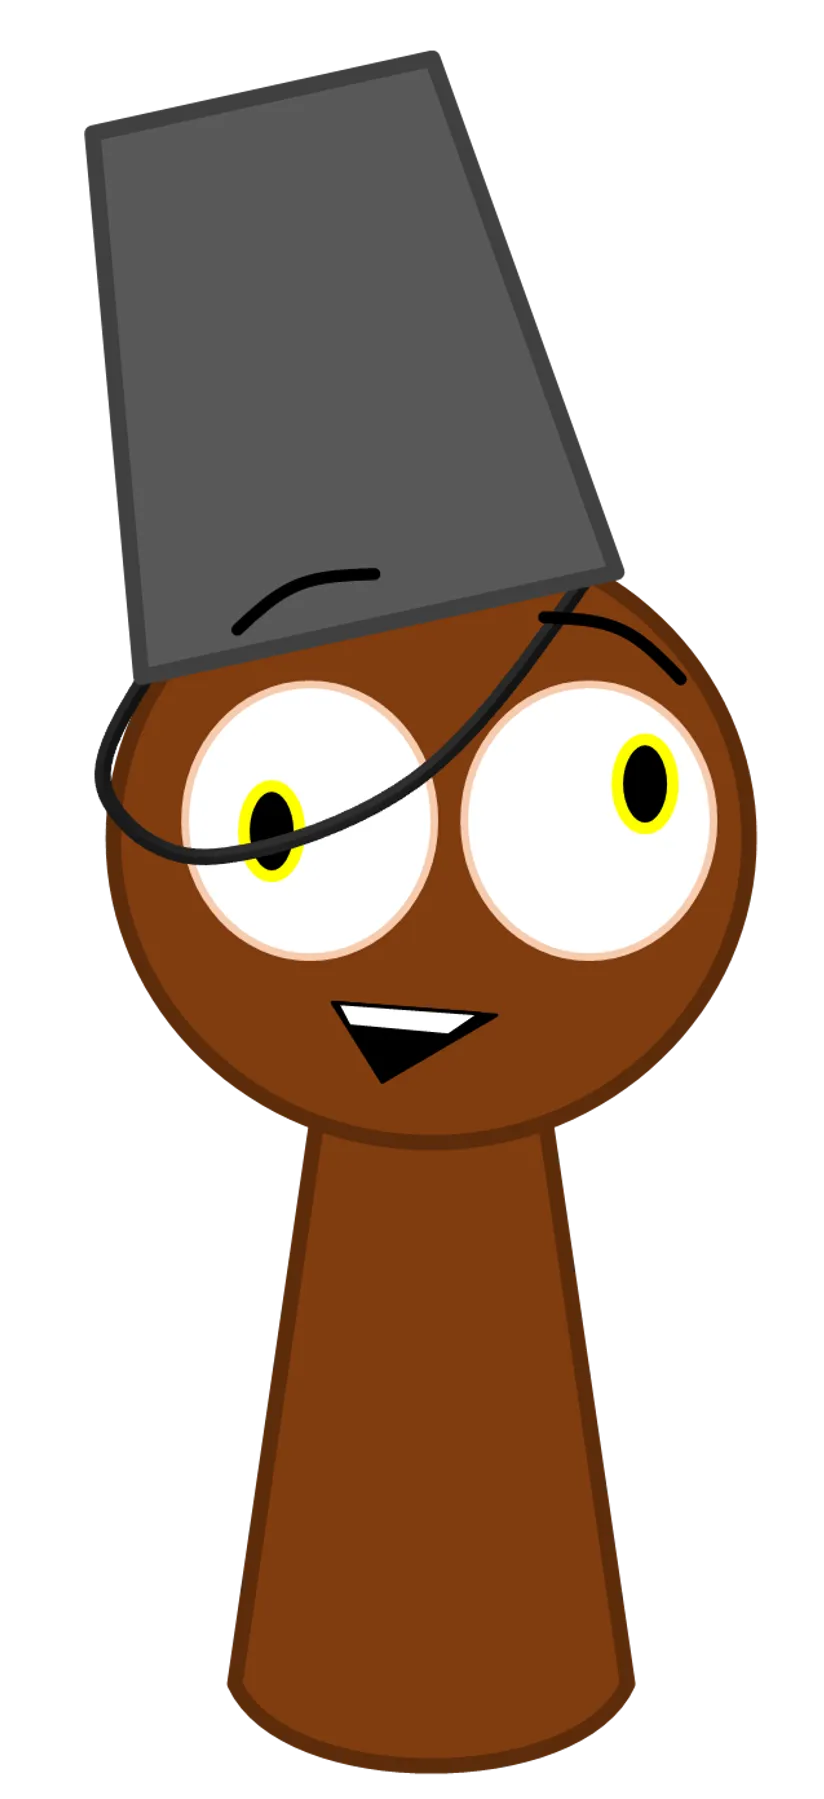 Brud | Brown | A bucket, or mechanical parts, sitting on the head |
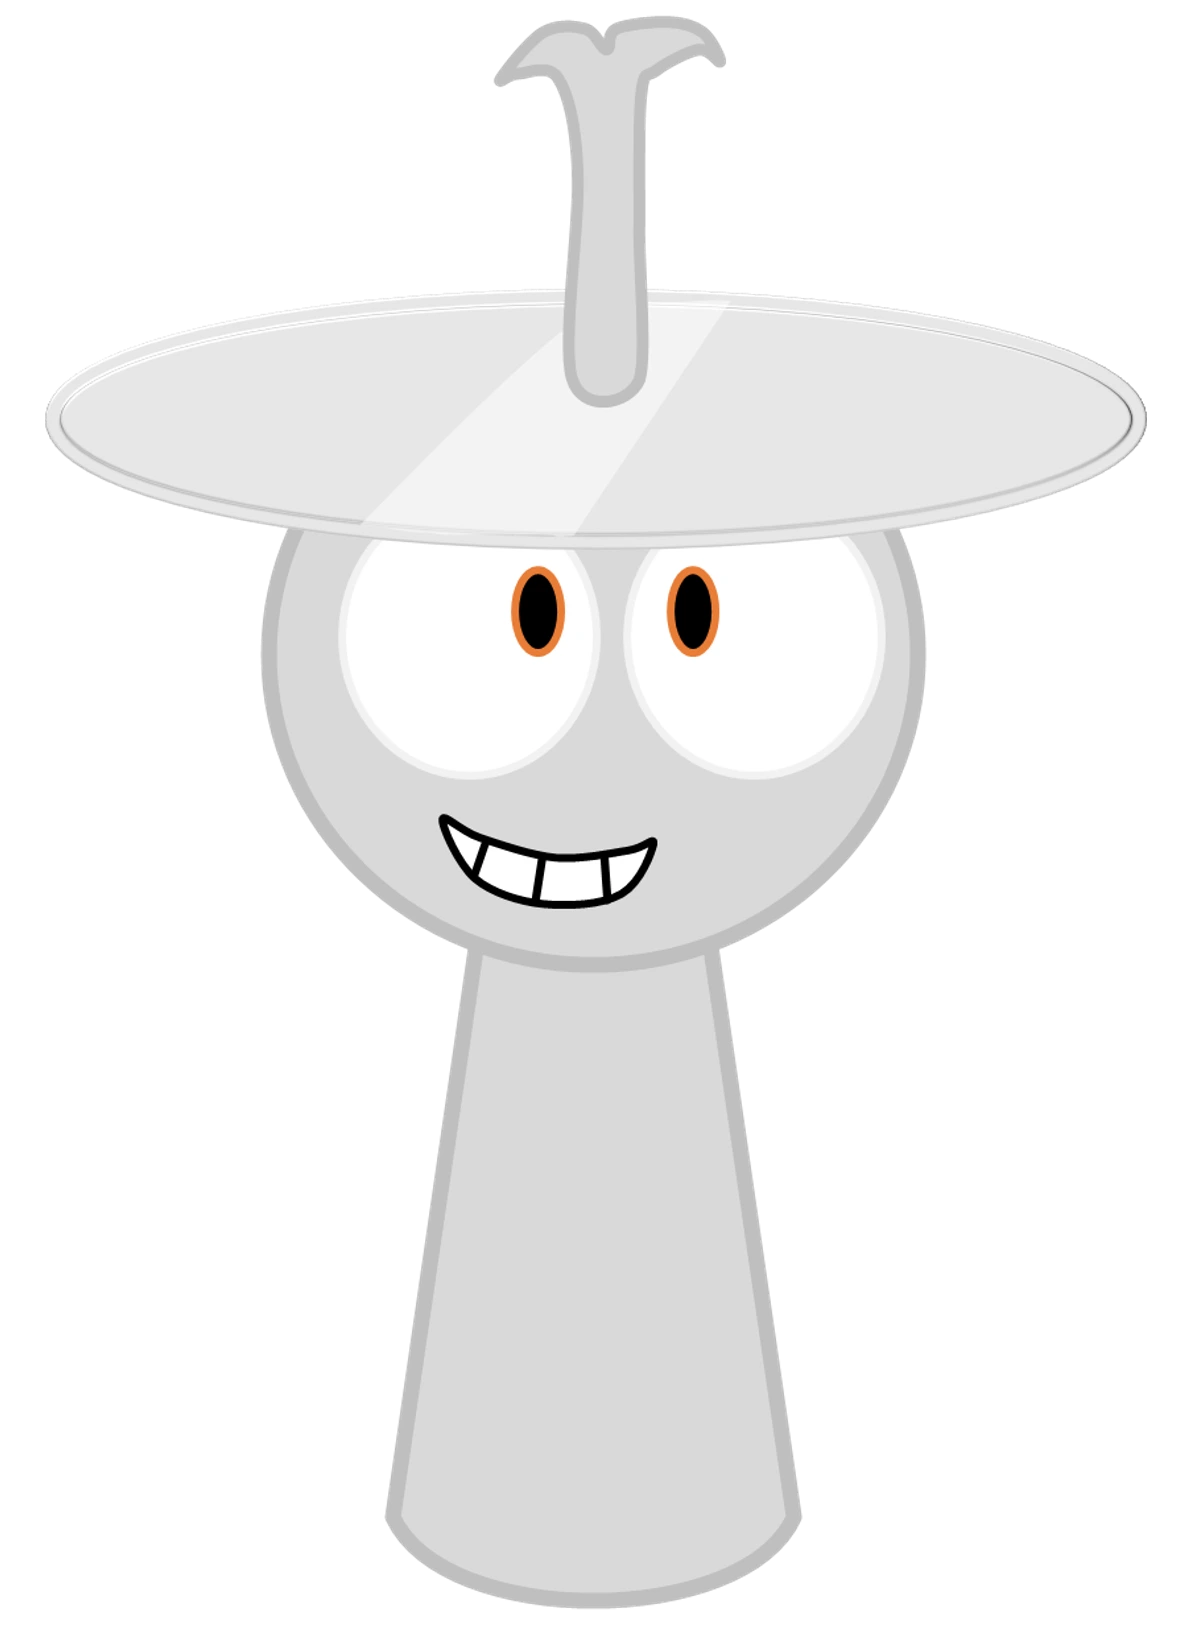 Clukr | Silver | Black eyes under heavy metallic eyelids |
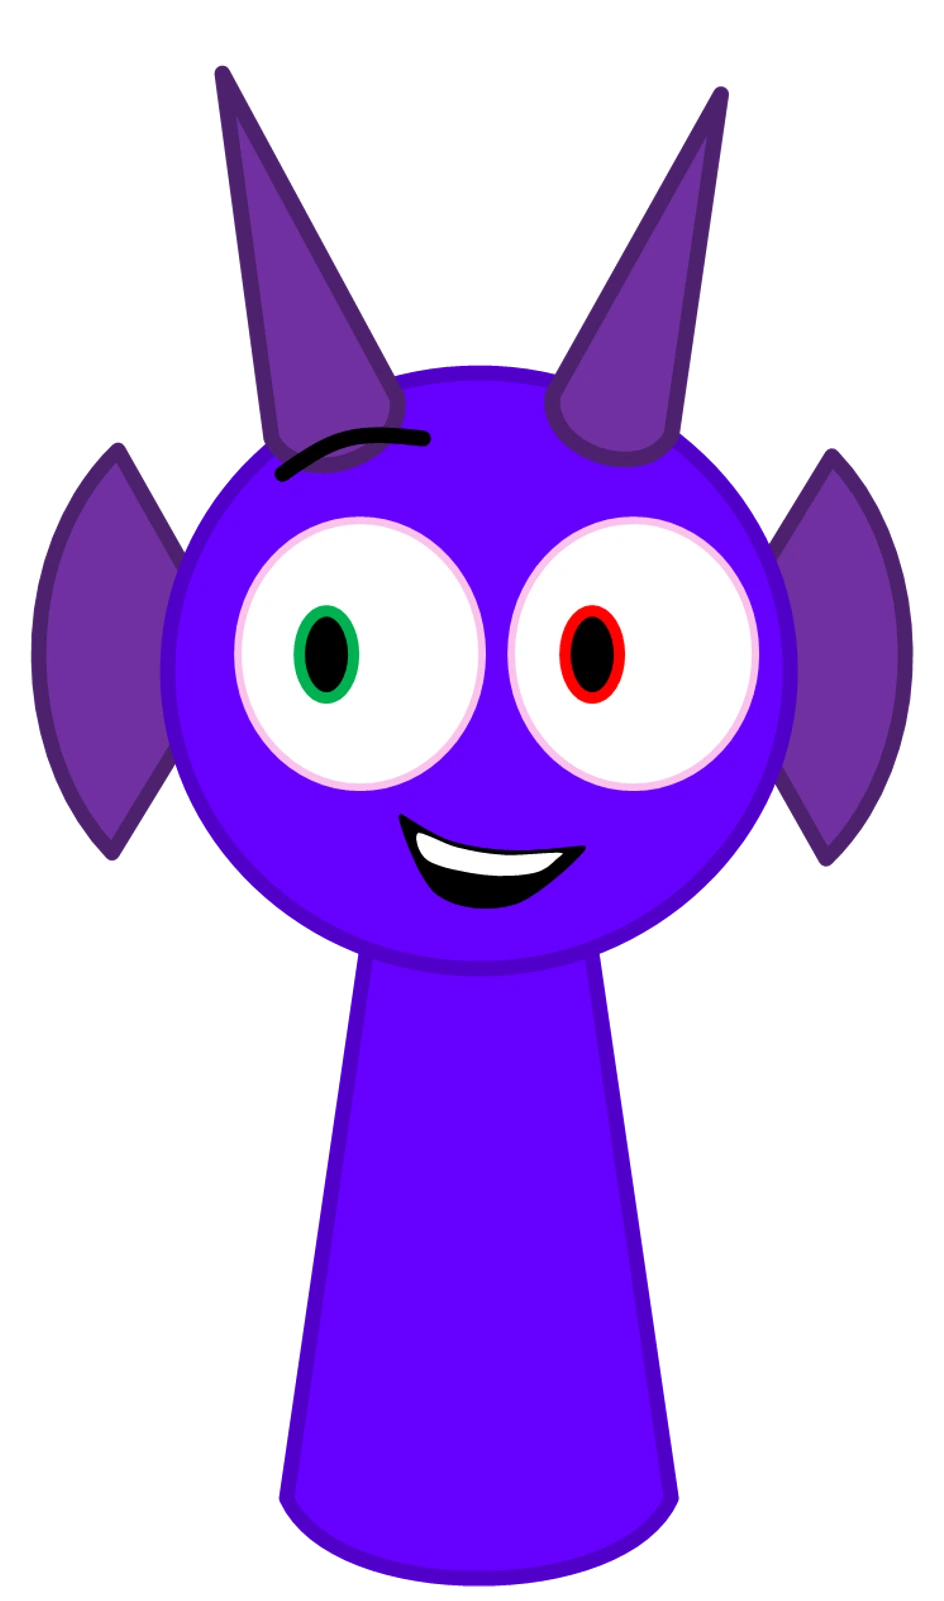 Durple | Vibrant purple | Dragon styling, two horns, a long tapering body |
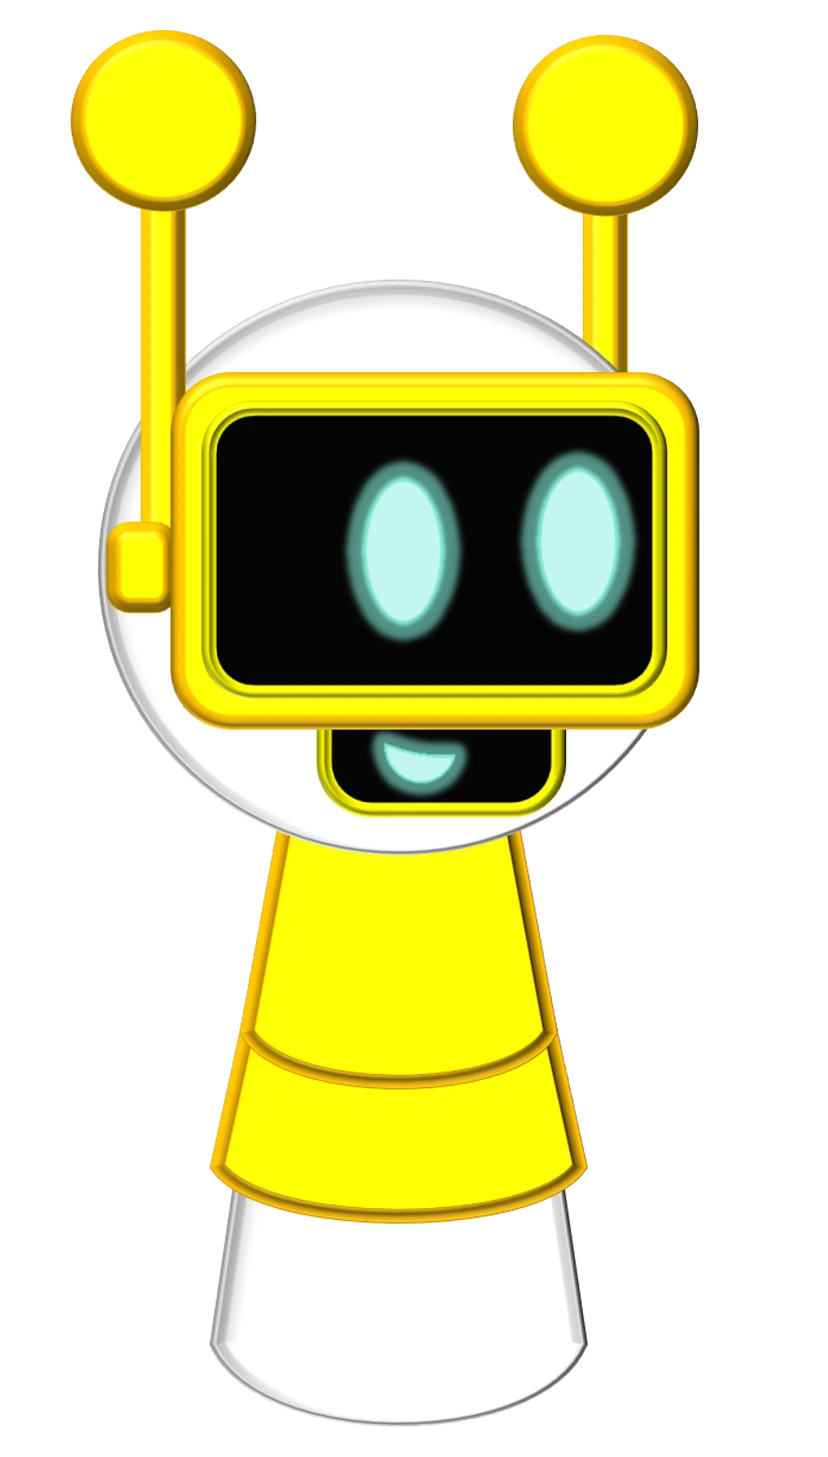 Fun Bot | Silver and gold | Silver body, gold neck plate, boxy robot head |
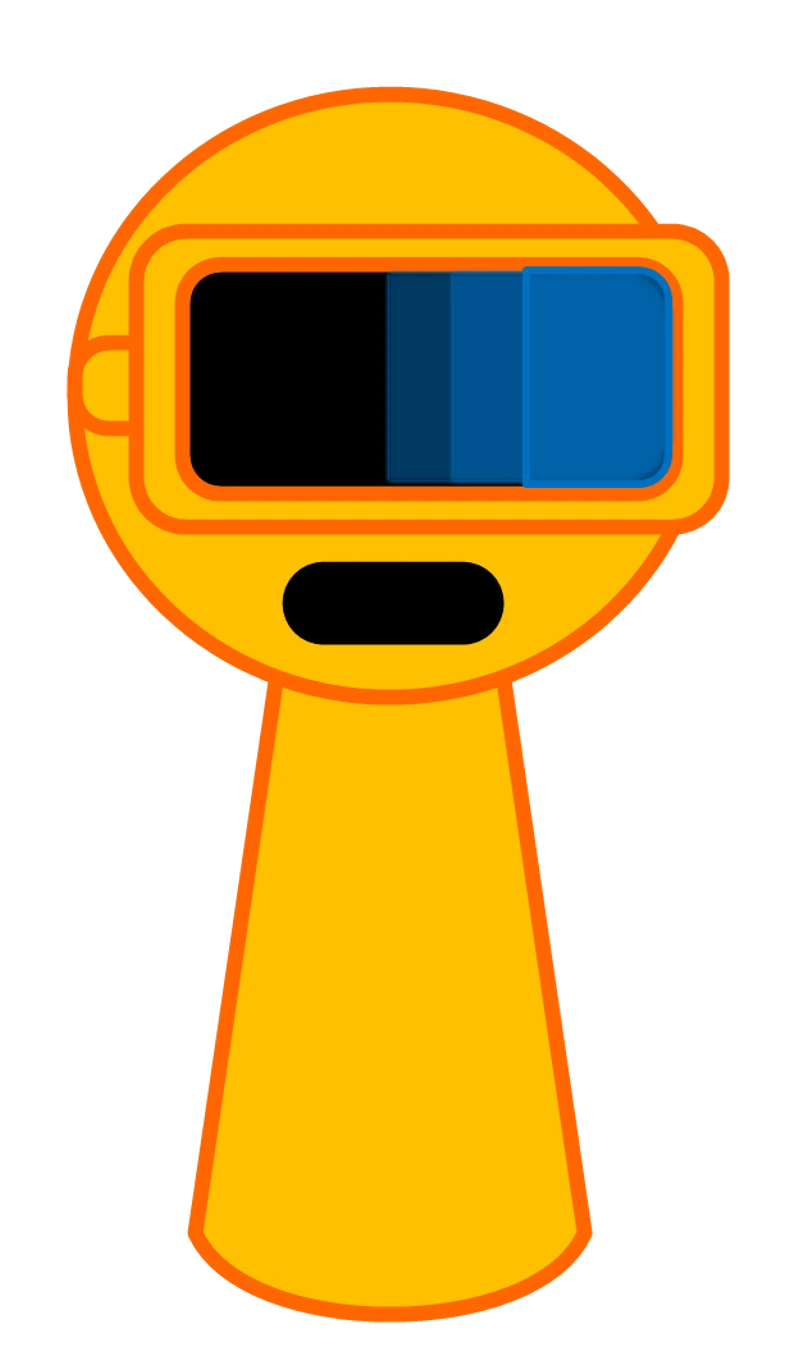 Garnold | Gold | Sleek high-tech suit, gold plating across the shoulders |
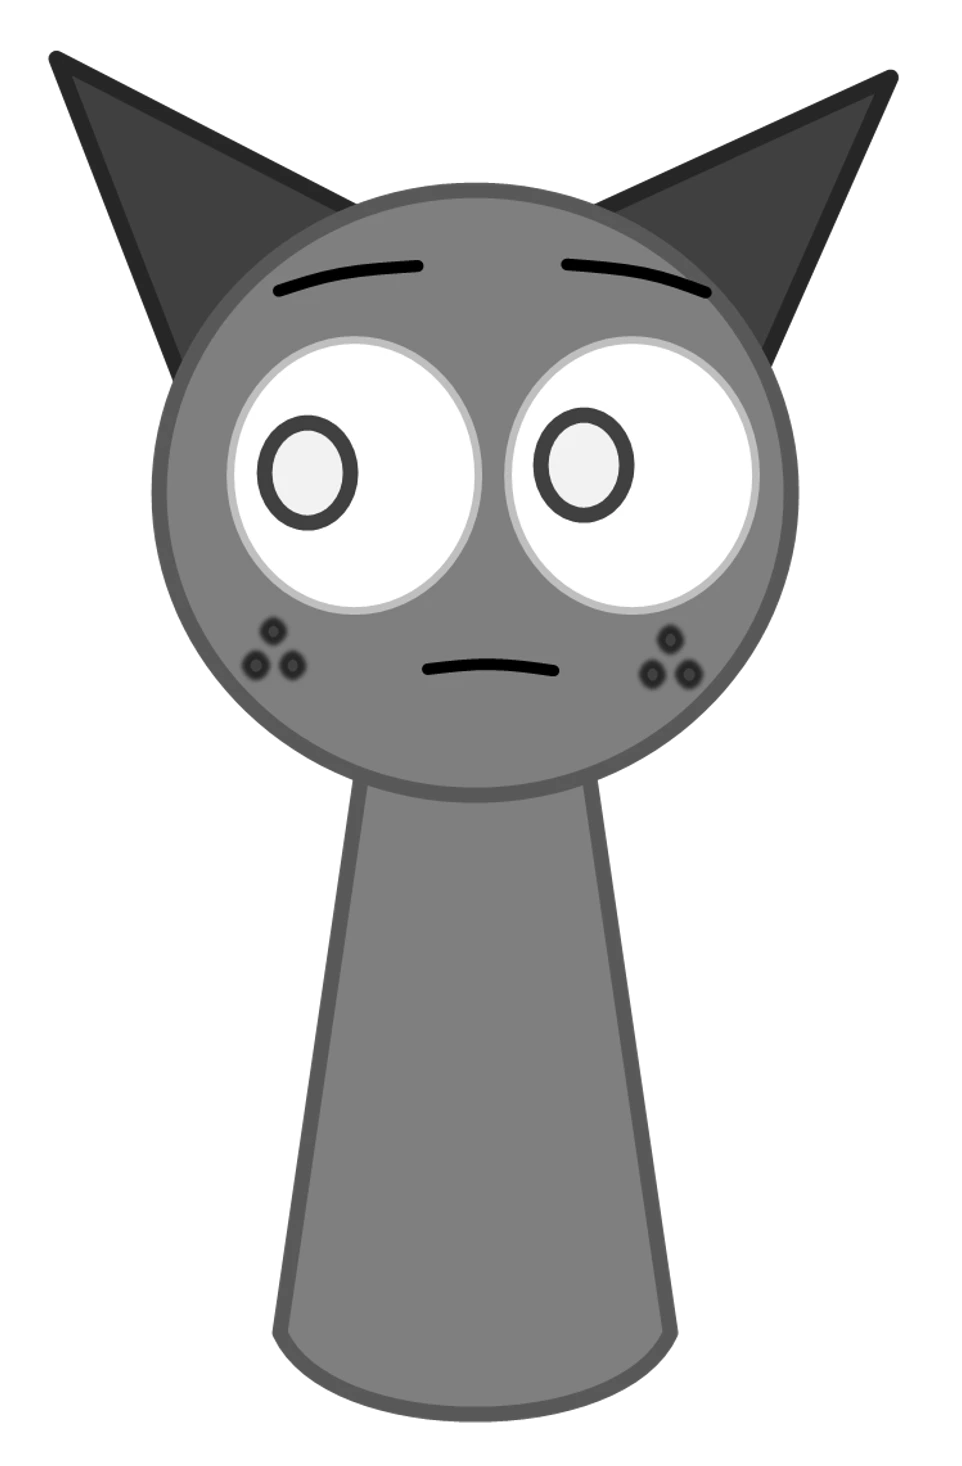 Gray | Gray | Cat-like ears and large round eyes |
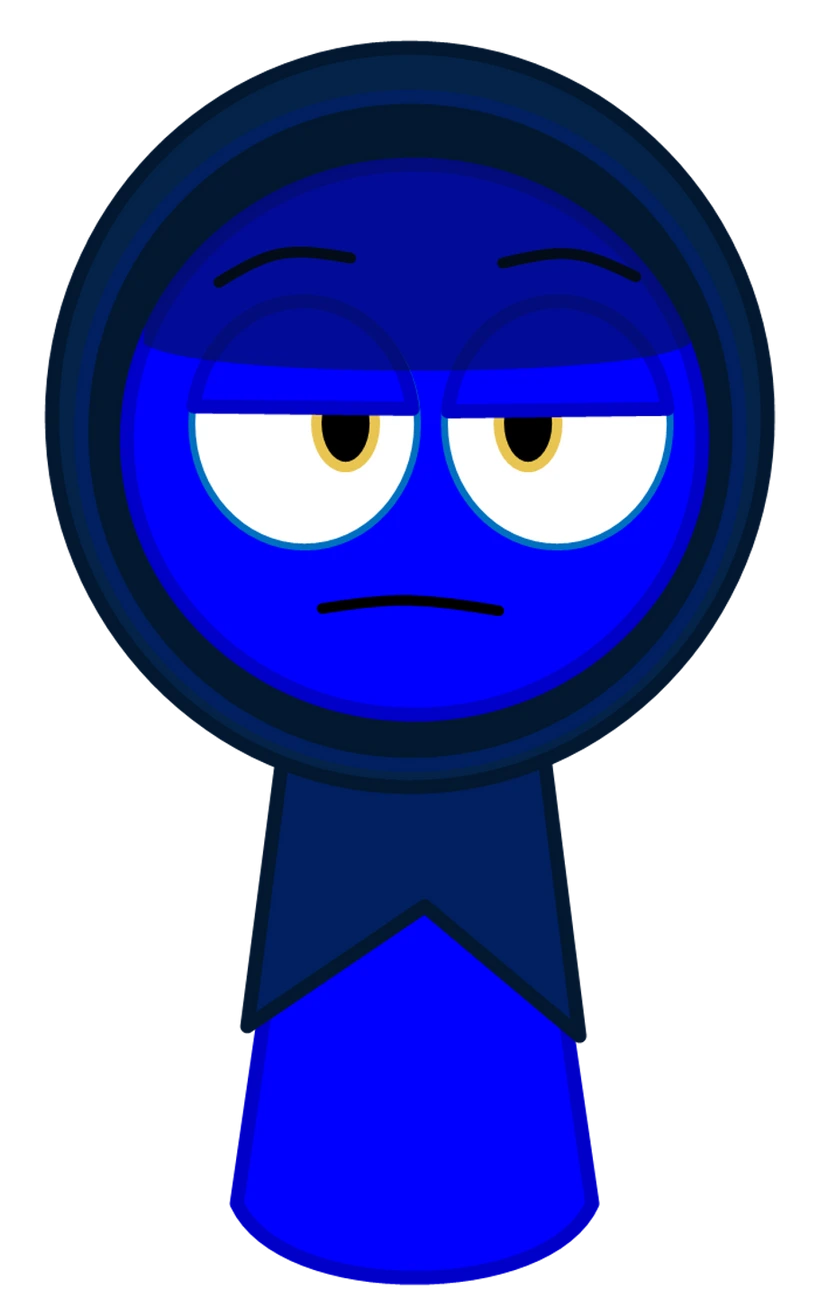 Jevin | Blue | Dark blue robe with a black hood |
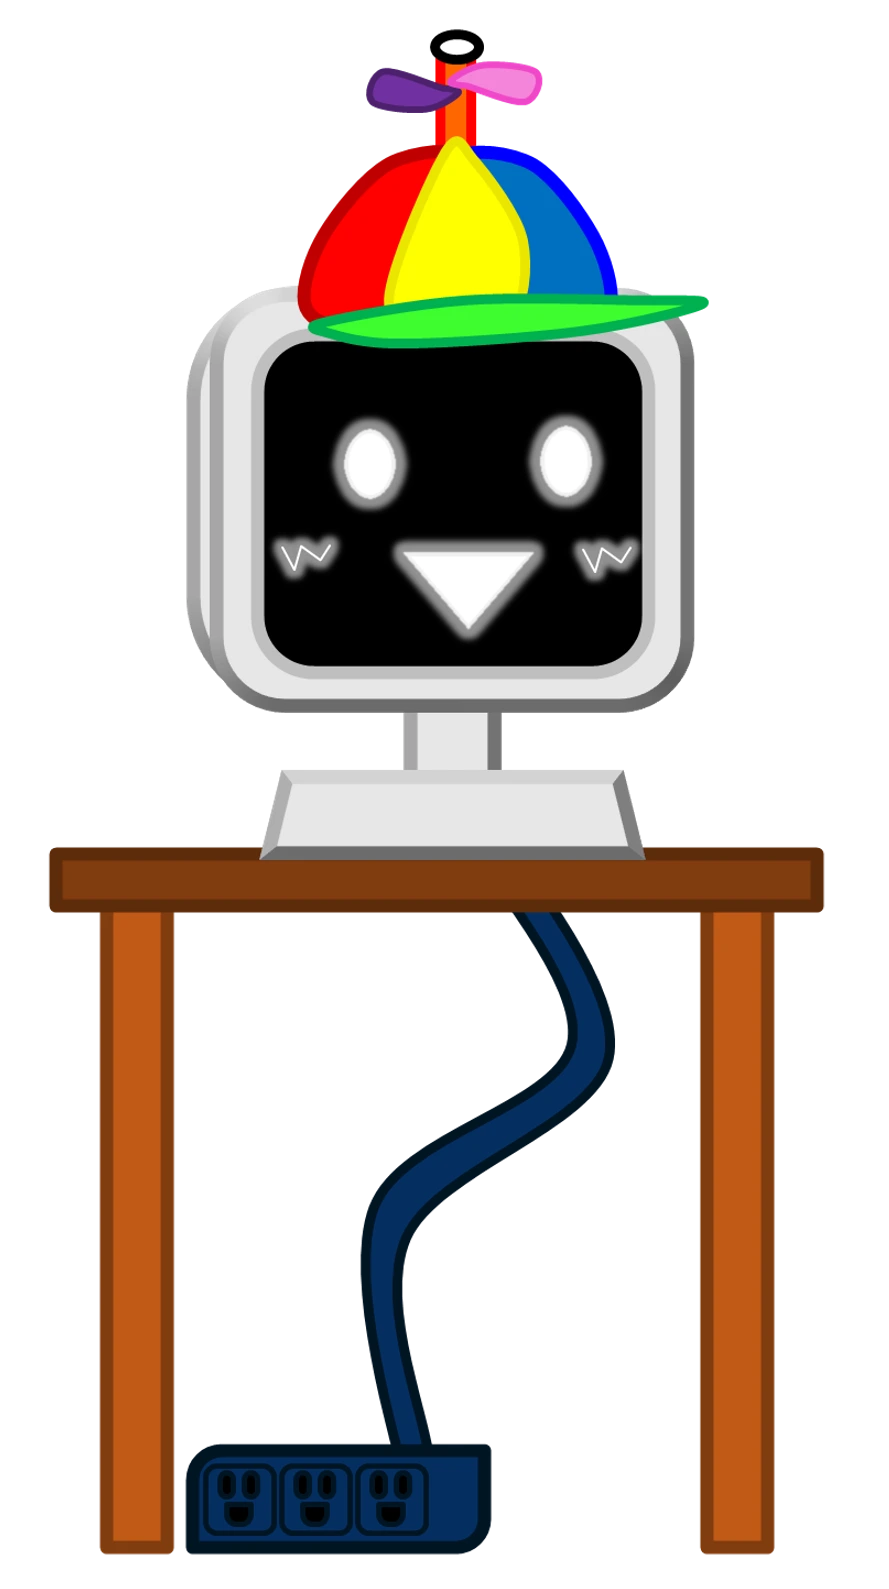 Mr. Fun Computer | Gray and rainbow | Rectangular monitor body, rainbow screen |
 Mr. Sun | Yellow and orange | Radiating sun disc behind the face |
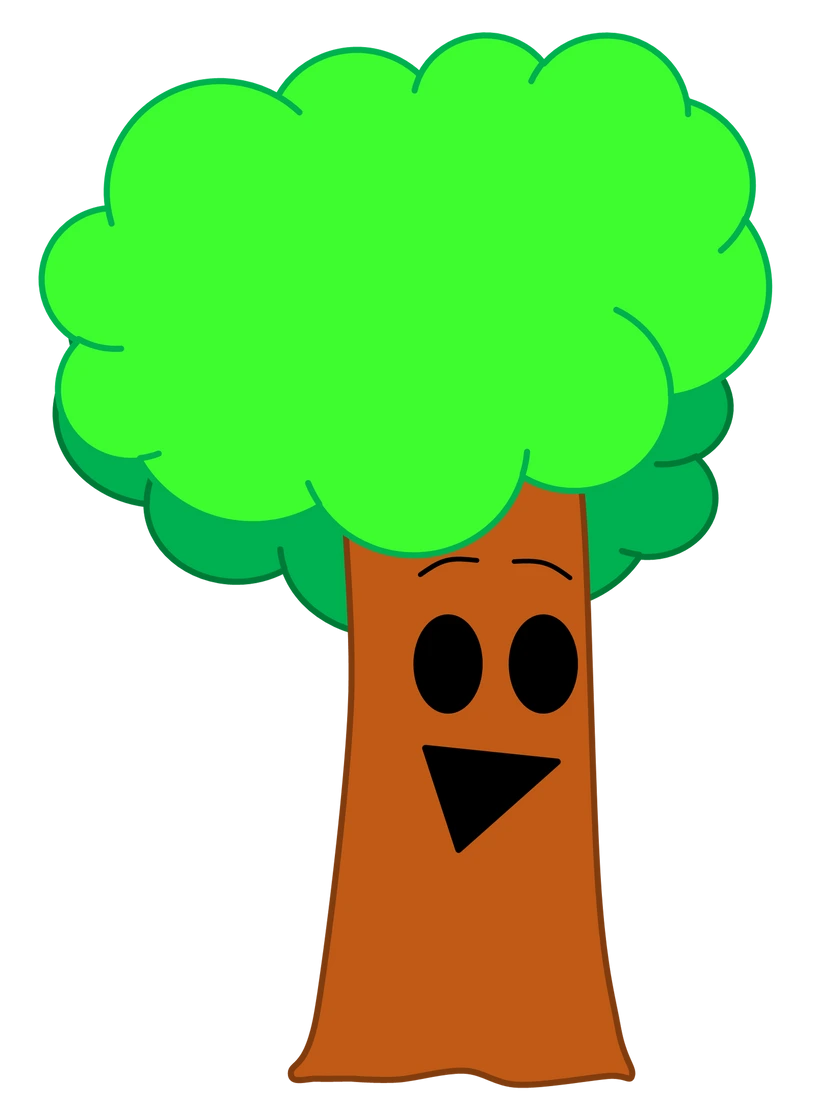 Mr. Tree | Green, brown, black | Leafy crown, brown trunk body, dark face |
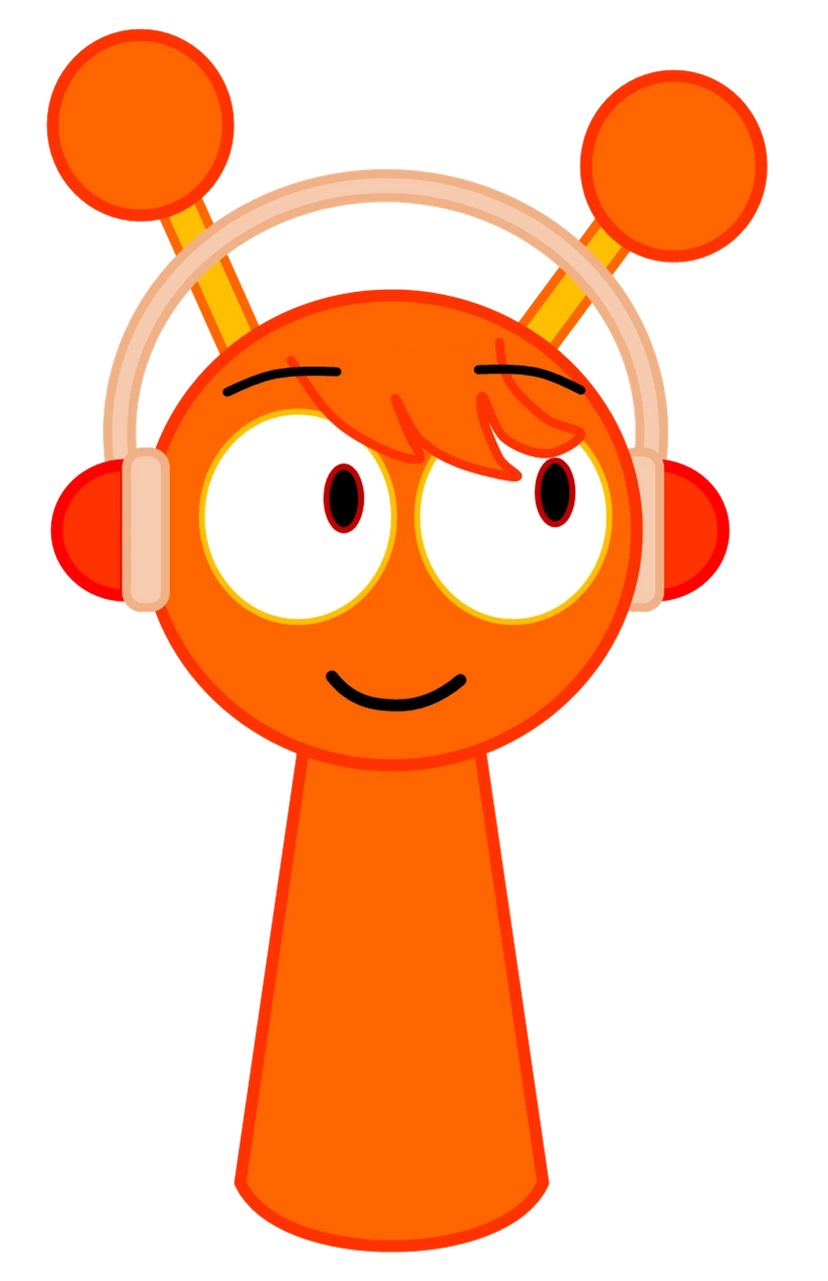 Oren | Orange | Antennae and oversized headphones |
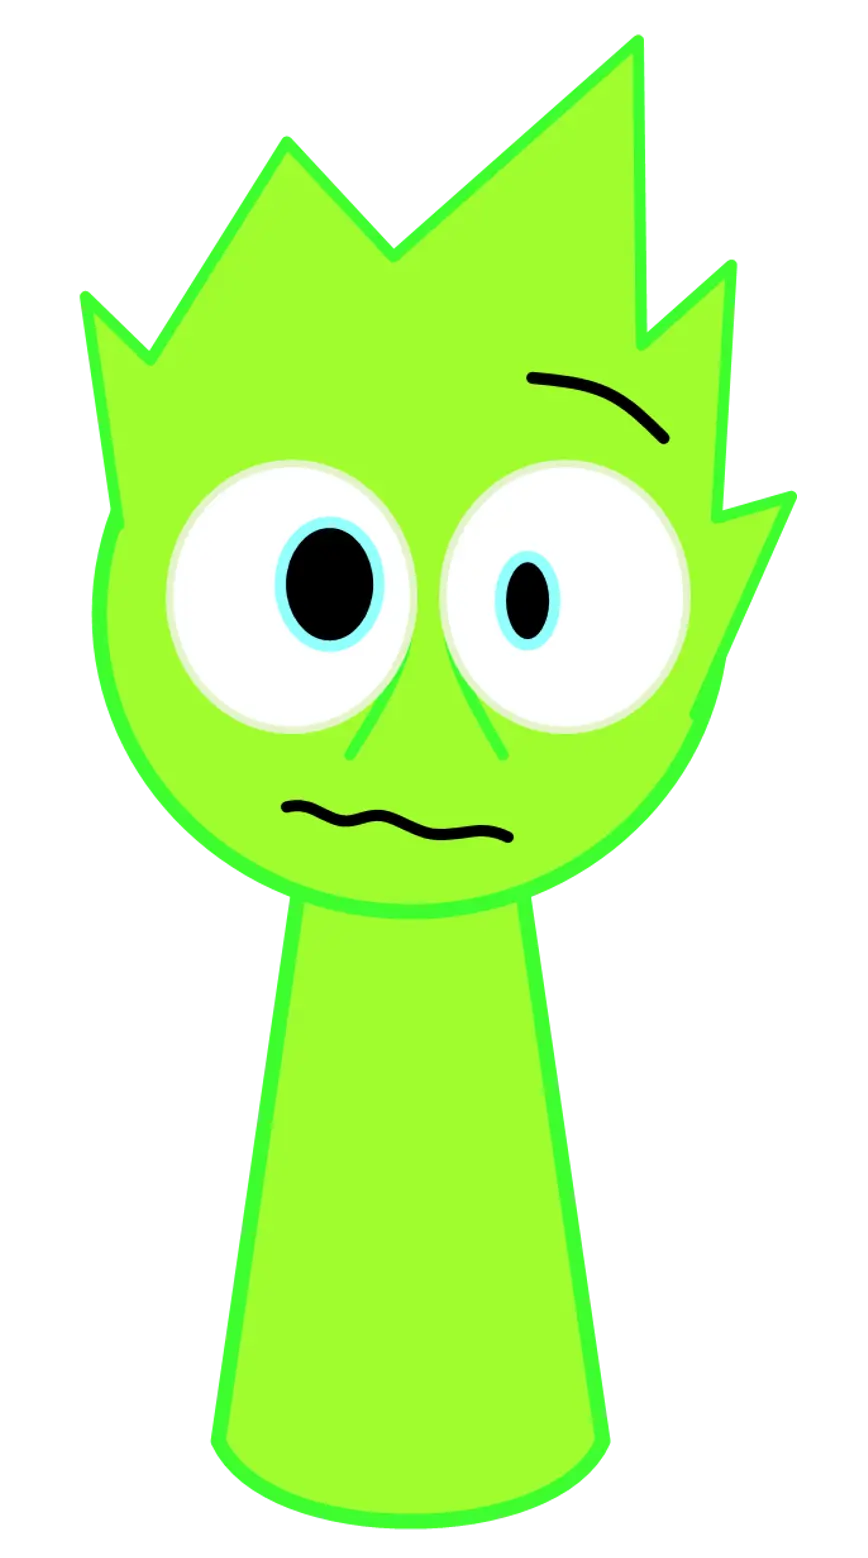 OWAKCX | Lime green | Tall lime body, effects-character stare |
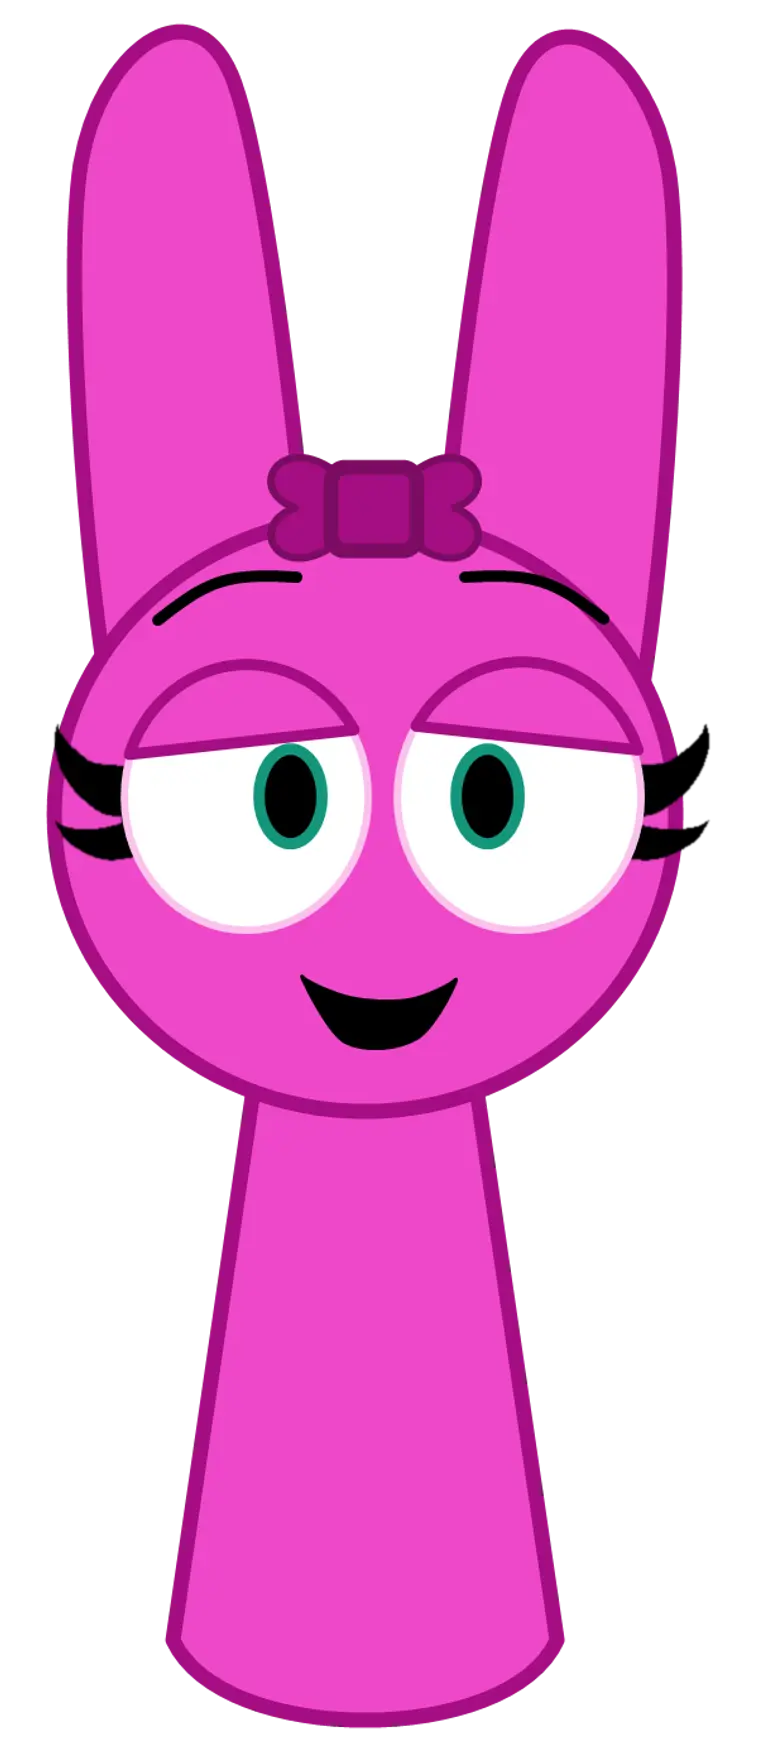 Pinki | Pink | Rabbit-inspired, magenta ribbon on top of the head |
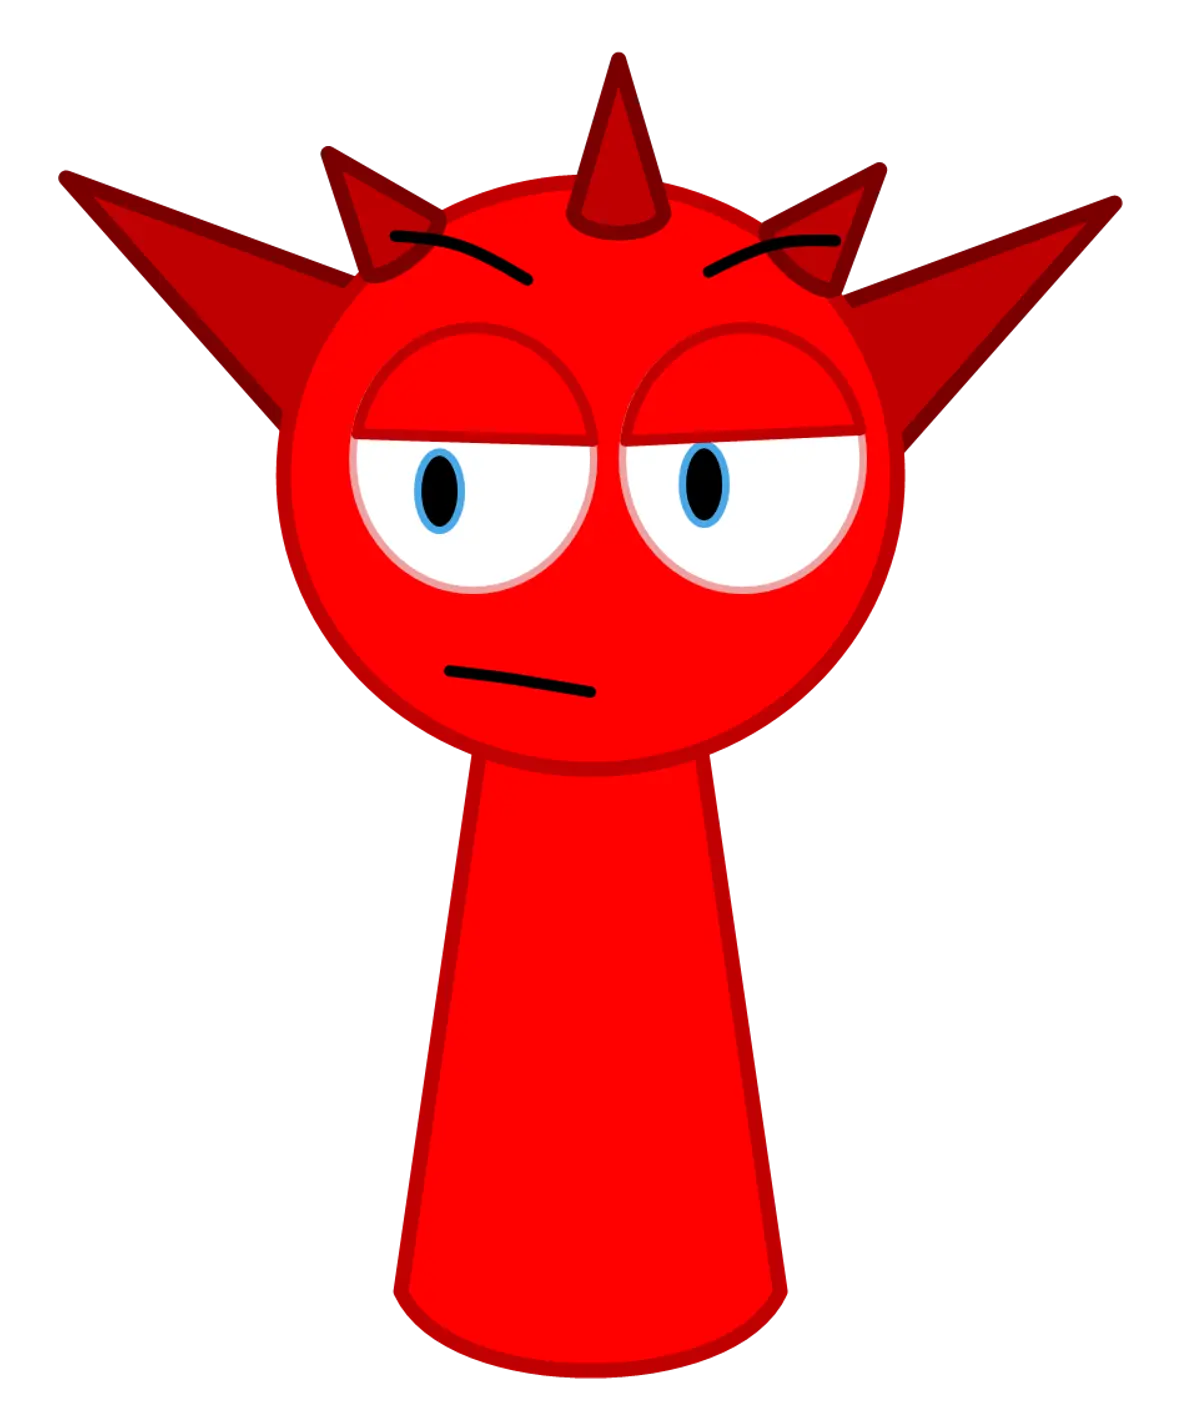 Raddy | Red | Crimson eyelids, black eyes, thin angry brows |
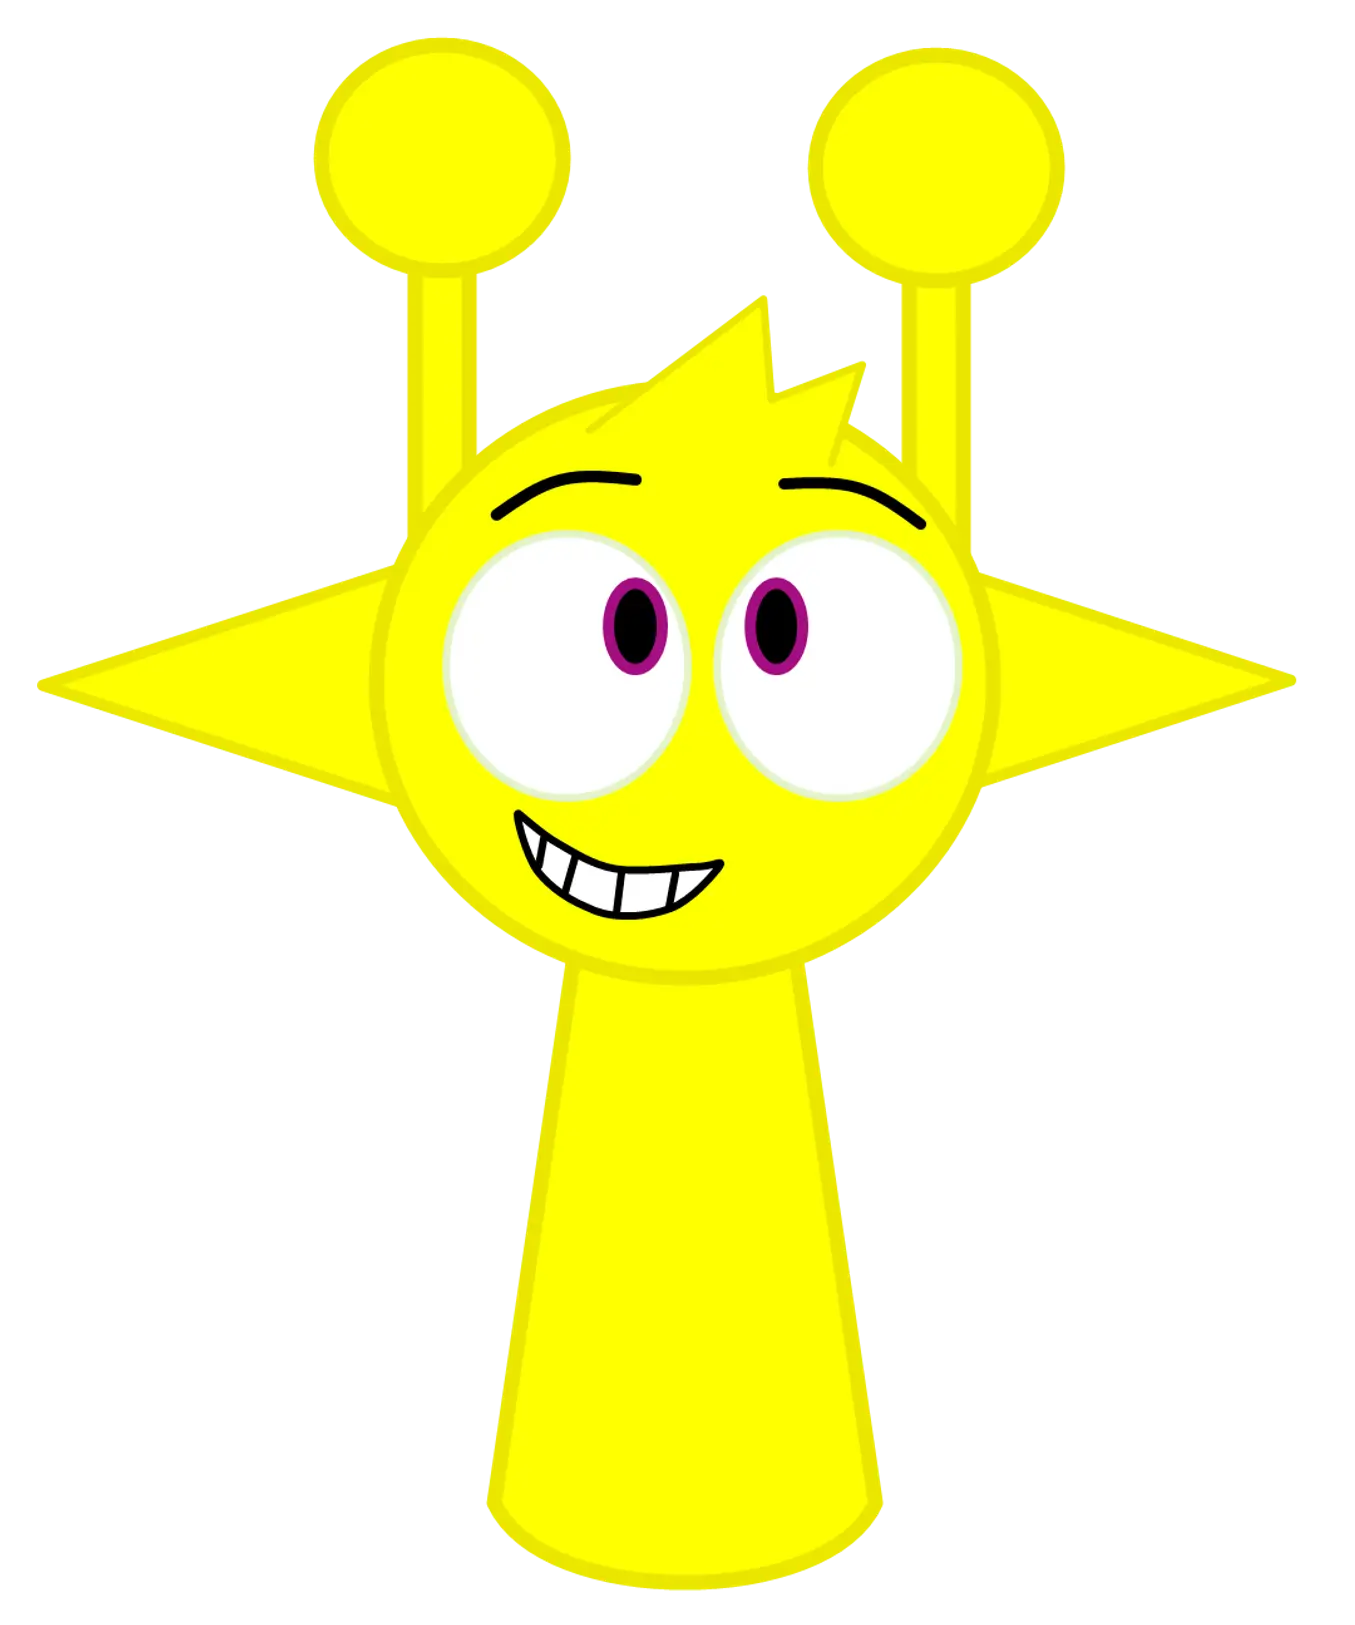 Simon | Yellow | Antenna with a yellow tip, confident stance |
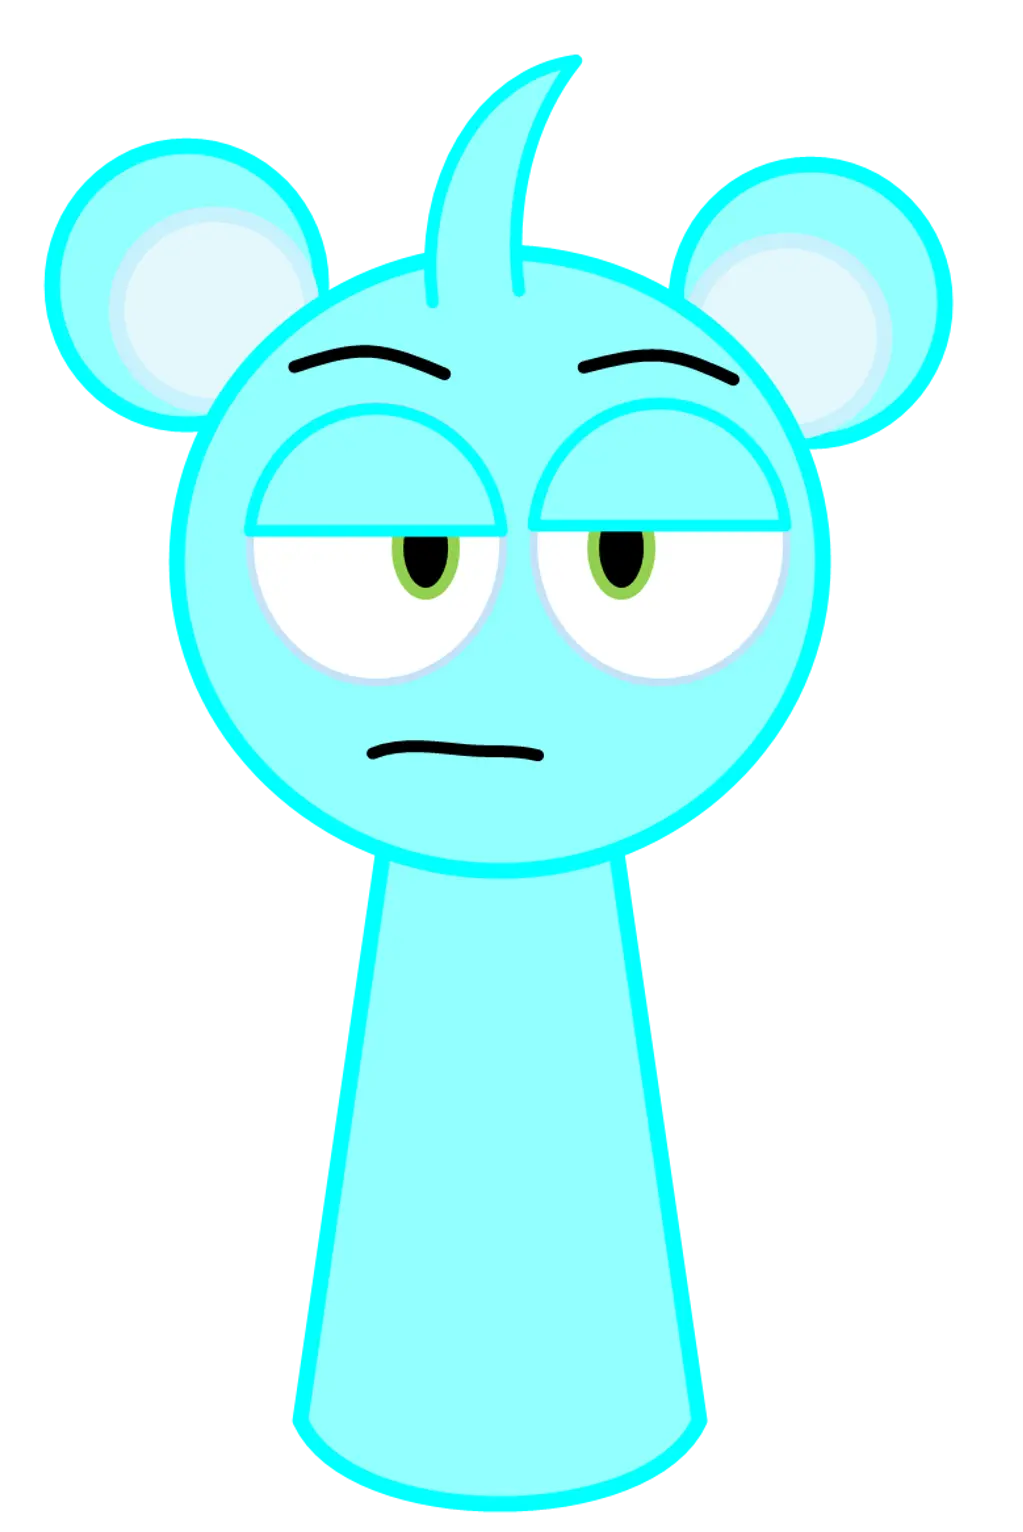 Sky | Sky blue | Clear pale blue, calm simple face |
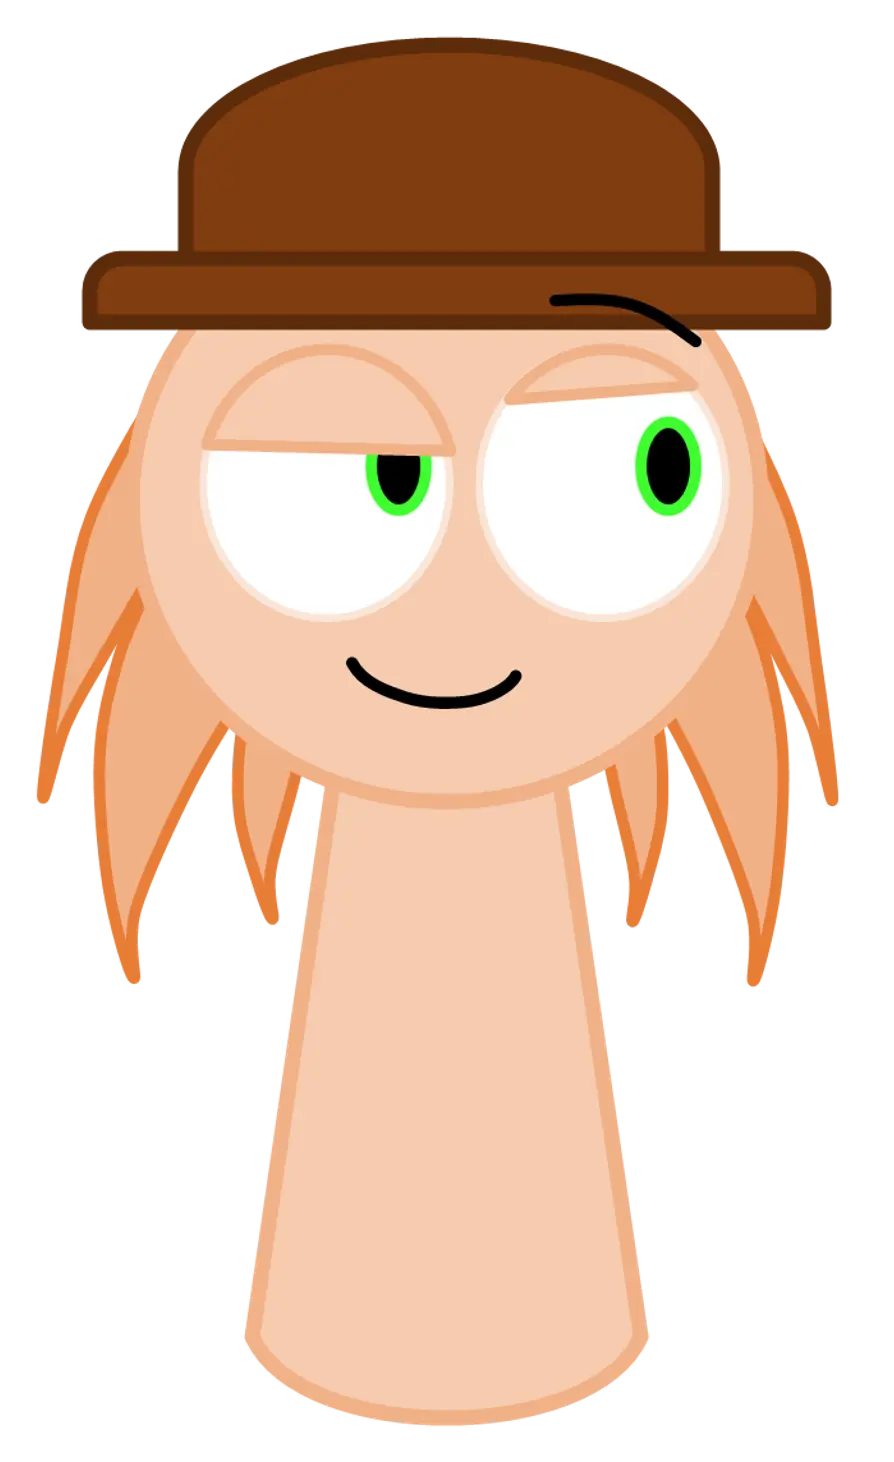 Tunner | Bourbon spice brown | Brown fur trim, calm expression |
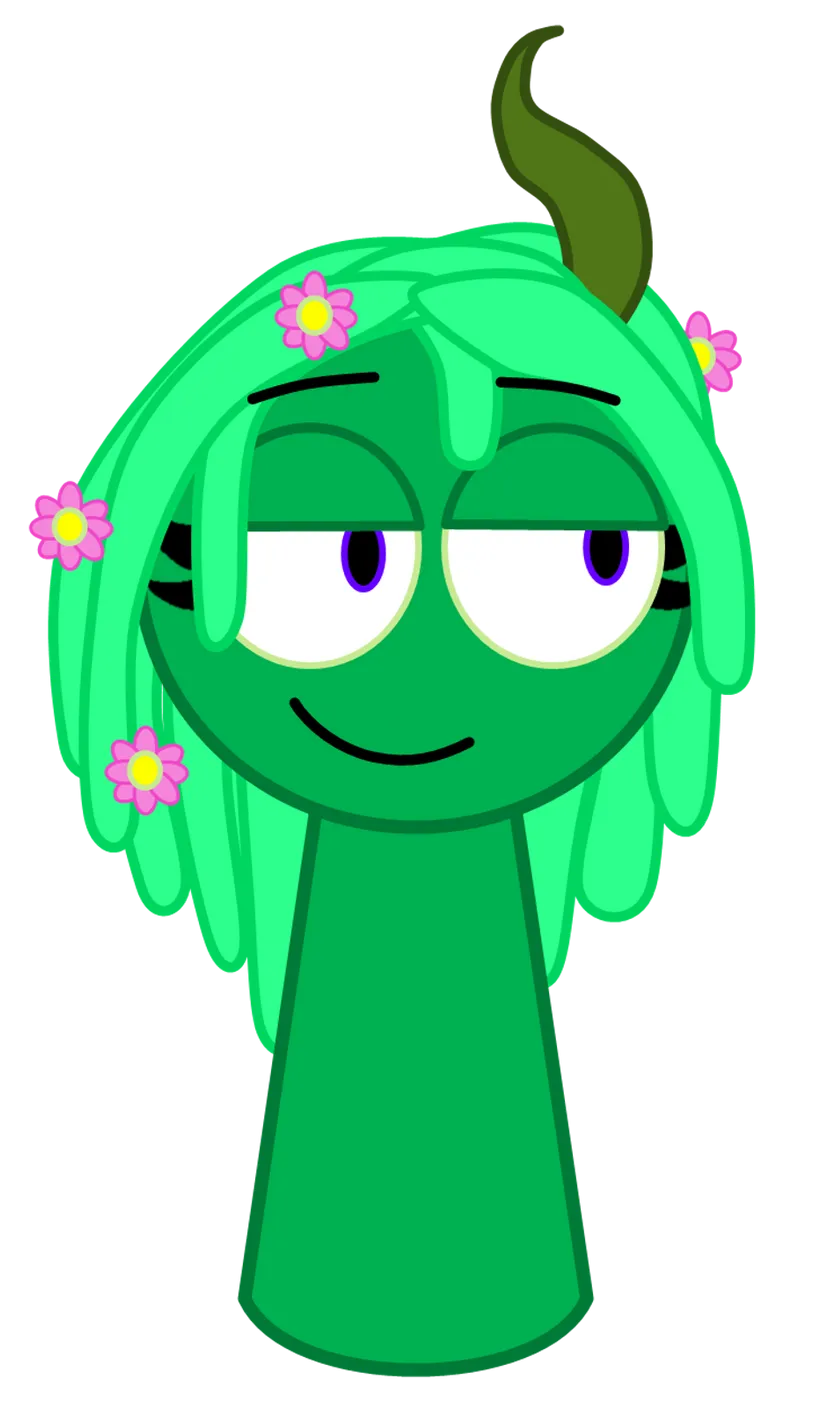 Vineria | Green | Bottle-shaped body, plant-inspired trim |
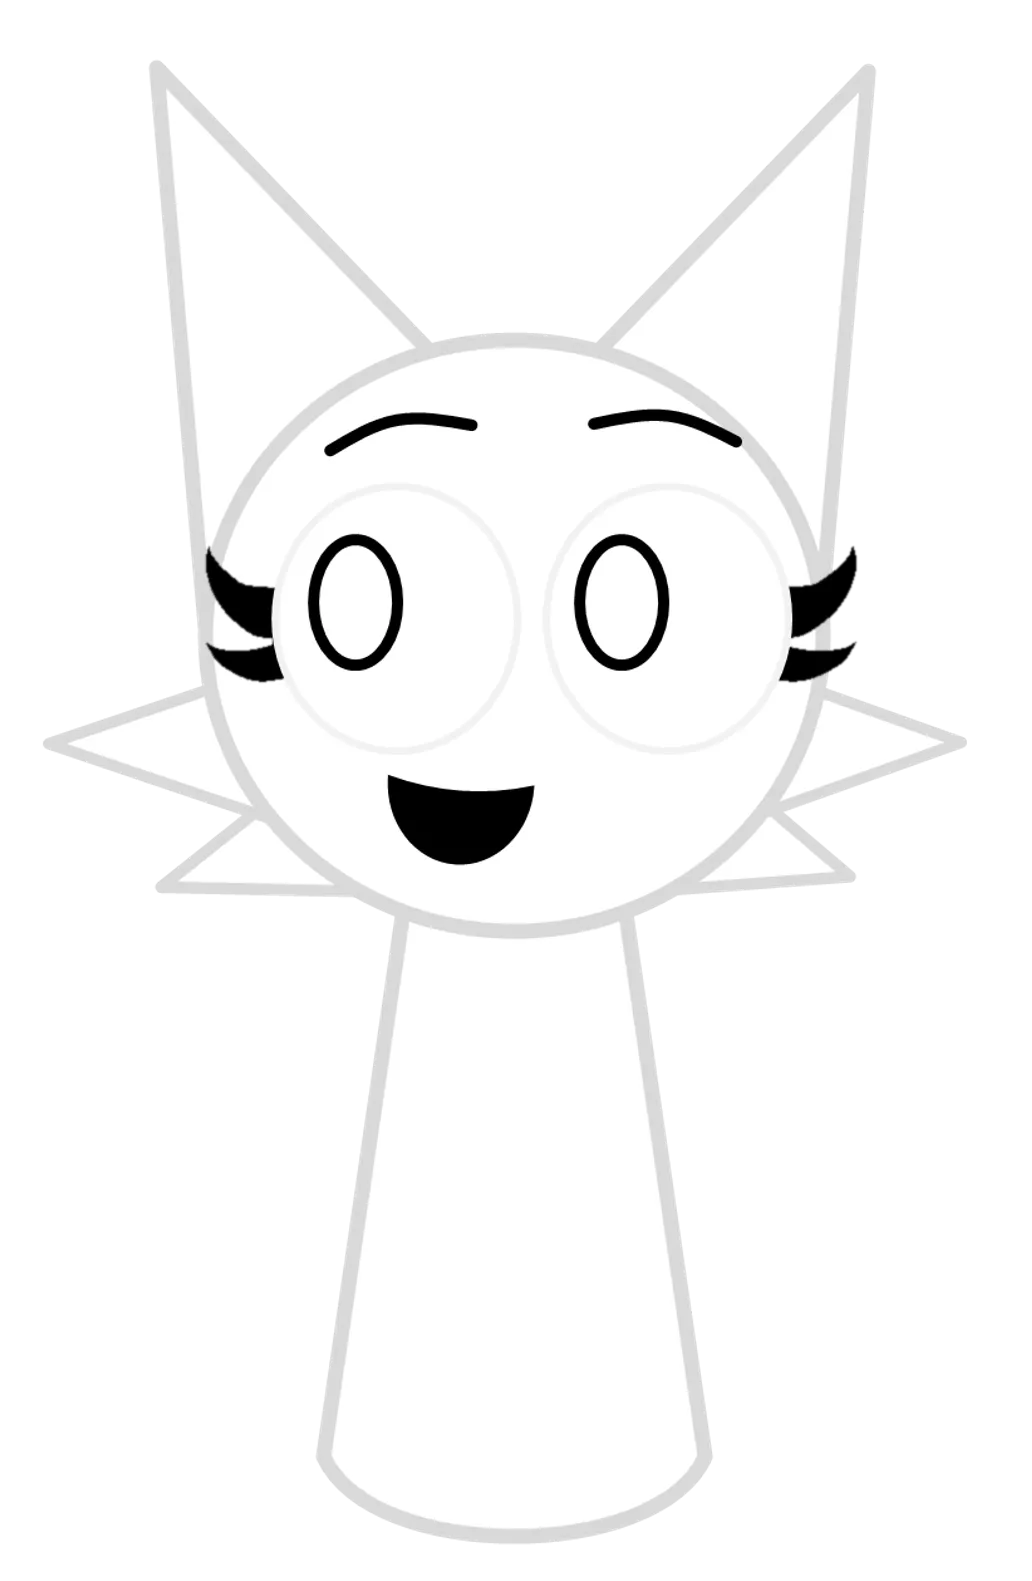 Wenda | White | Cat-like face, tufts of fur on the cheeks |
The four stitches you need
Nothing below needs a stitch outside these four, and each one is worked into the round under it. The terms are US; a UK pattern calls the same stitch a double crochet, so read sc as dc and read an increase as two stitches into one.
- Magic ring. Wrap the yarn twice around two fingers, slide it off, and work the first round into the loop. Pull the short tail at the end and the centre closes with no hole. If the ring keeps loosening, chain two and work the first round into the second chain from the hook instead; the shape is the same.
- Single crochet (sc). Hook through the stitch, yarn over, pull up a loop, yarn over again, pull through both loops. That is the whole body of every character.
- Increase (inc). Two single crochet into the same stitch. This is what turns a flat disc into a dome, and every growing round below is built from it.
- Decrease (dec). Hook through the front loop of the next stitch and the front loop of the one after it, then work them as one single crochet. Working the front loops only keeps the fabric smooth; a decrease through both loops leaves a visible pucker on the finished face.
Reading the pattern: the number in brackets at the end of a round is the stitch count you should have when the round is done. If it does not match, undo the round rather than carrying the error forward, because every later round assumes that count.
The base body
This is a generic round practice body, not a tested replica of each character. Use US crochet terms and work in a continuous spiral: do not join with a slip stitch. Move a stitch marker to the first stitch of each new round.
| Round | Instructions | Count |
|---|---|---|
| 1 | 6 sc into a magic ring. | 6 |
| 2 | Inc in each stitch, 6 times. | 12 |
| 3 | (1 sc, inc) 6 times. | 18 |
| 4 | (2 sc, inc) 6 times. | 24 |
| 5 | (3 sc, inc) 6 times. | 30 |
| 6–12 | Sc in every stitch for 7 rounds. | 30 |
| 13 | (3 sc, dec) 6 times. | 24 |
| 14 | (2 sc, dec) 6 times. Add stuffing in small pieces without stretching the stitches. | 18 |
| 15 | (1 sc, dec) 6 times. Add the last stuffing before closing. | 12 |
| 16 | Dec 6 times. | 6 |
Fasten off, leaving a sewing tail. Thread it through the front loops of the remaining 6 stitches, draw the opening closed, secure it and weave in the end. Closing is a finishing step, not an extra round.
Size and checking. Finished height and yarn use depend on yarn, hook and tension; no measured sample size is promised here. The round totals above have been checked arithmetically, but this guide has not yet been independently test-crocheted. Record your yarn, hook, finished height, yarn weight used and any adjustments for your next piece. Adding plain rounds makes a taller body; check the proportions against the character reference before making attachments.
Making each one recognisable
The body is the easy part; almost all of the recognition lives in four places.
Ears. Gray and Wenda both read as cat-like, and both are recognisable from the ears before anything else. Work a small flat circle, fold it, and sew it on at the ten and two o'clock positions. Angling them slightly outward does more for the silhouette than making them bigger.
Head props. Pinki's ribbon, Oren's headphones, Simon's antenna and Brud's bucket need their own shapes; this overview does not yet include those patterns. Position attachments against the reference picture, mark their placement with removable stitch markers, and sew securely around the entire joining edge. Remove all markers before use. Do not make small detachable accessories for young children.
Eyes. Embroider the eyes and eyelids with contrasting yarn. Mark the face centre and compare both sides before stitching; secure the yarn ends inside the body. Character-specific placement and process photos will need a measured, tested sample rather than guessed round numbers.
Outlines. Black has a white outline and most others have a dark edge. A single crochet border worked around a flat face piece, in one shade lighter or darker than the body, reproduces that edge without any colourwork.
Finishing, and one safety point
Secure attachments and yarn ends, and check for loose parts, open seams and escaping stuffing before use and after washing. For children under three, avoid plastic eyes, small glued parts and detachable accessories. Crocheted or embroidered details still need secure construction; this guide does not certify a finished item as safe.
Before selling or distributing a finished item, check the product-safety requirements that apply to it and where it will be used. In the United States, an age label such as “14+” or “adult collectible” does not by itself determine whether an item is a children's product. Its design, marketing and reasonably foreseeable use also matter. See the CPSC children's products guidance; do not use an age label as a substitute for the applicable safety requirements.
What is allowed, and what is not
Making these for yourself, for your children, or as a gift needs no permission from us, and it never will. That is for personal, non-commercial use; not for sale, not for mass production.
Once it is finished, take a photograph of it. The fan works wall takes pictures from anyone who made something, and shows each one with the name of the person who made it.
The personal-use permission above applies only to designs we are entitled to license. It does not grant rights to third-party mod characters or artwork; check the relevant creator’s terms for those. Keep the pattern author’s credit and follow the permissions stated with their pattern.
What we ask you not to do
- Sell the finished toy, a printed copy of this pattern, or a kit built around it. Those are physical goods, they sit outside the fan content policy that covers video, and they need a written licence.
- Run a production batch: a factory order, a shop listing with a quantity, or anything made by someone else to sell.
- Republish this page's colour chart as your own pattern, paid or free, or put it behind a paywall.
- Put the characters on merchandise, packaging, or into a token or NFT product.
- Register the character names as your own trademarks, or claim the designs as yours.
None of that touches the video side. Recording yourself making one, posting the process, or streaming a session is allowed under the fan content policy, and the ad revenue on it stays with you.
If you want to sell, or a shop has asked you to supply them, write to hi@sprunki.com and describe what you have in mind. A licence is a conversation, not a refusal.
Plan the doll before the first stitch
- Pick one character and one pose; a changing pose means a different head shape.
- Match yarn weight to hook size, then check the finished height against the character head-to-body ratio.
- Choose embroidered features for young children and plan their placement before closing the body.
- Write down the colour of every panel before buying yarn; a cast usually reuses one palette.
- Finish the first limb completely before starting the second, so both come out the same size.
Where to go next
The character pages carry the full profile for each one, including birthday, personality and horror form, which is often the reference people actually need when a detail is ambiguous. Start from the character hub, then open the individual entry.
- Play the game — every character's sound starts here.
- SPRUNKI characters hub — all twenty profiles in one place.
- Character roles — beats, effects, melodies and vocals.
- Sprunki games — the mods these characters appear in.
- More guides — the rest of the blog.
Discuss Sprunki
Which game did you play, and how did your mix turn out? Tell us below.
Loading comments…