
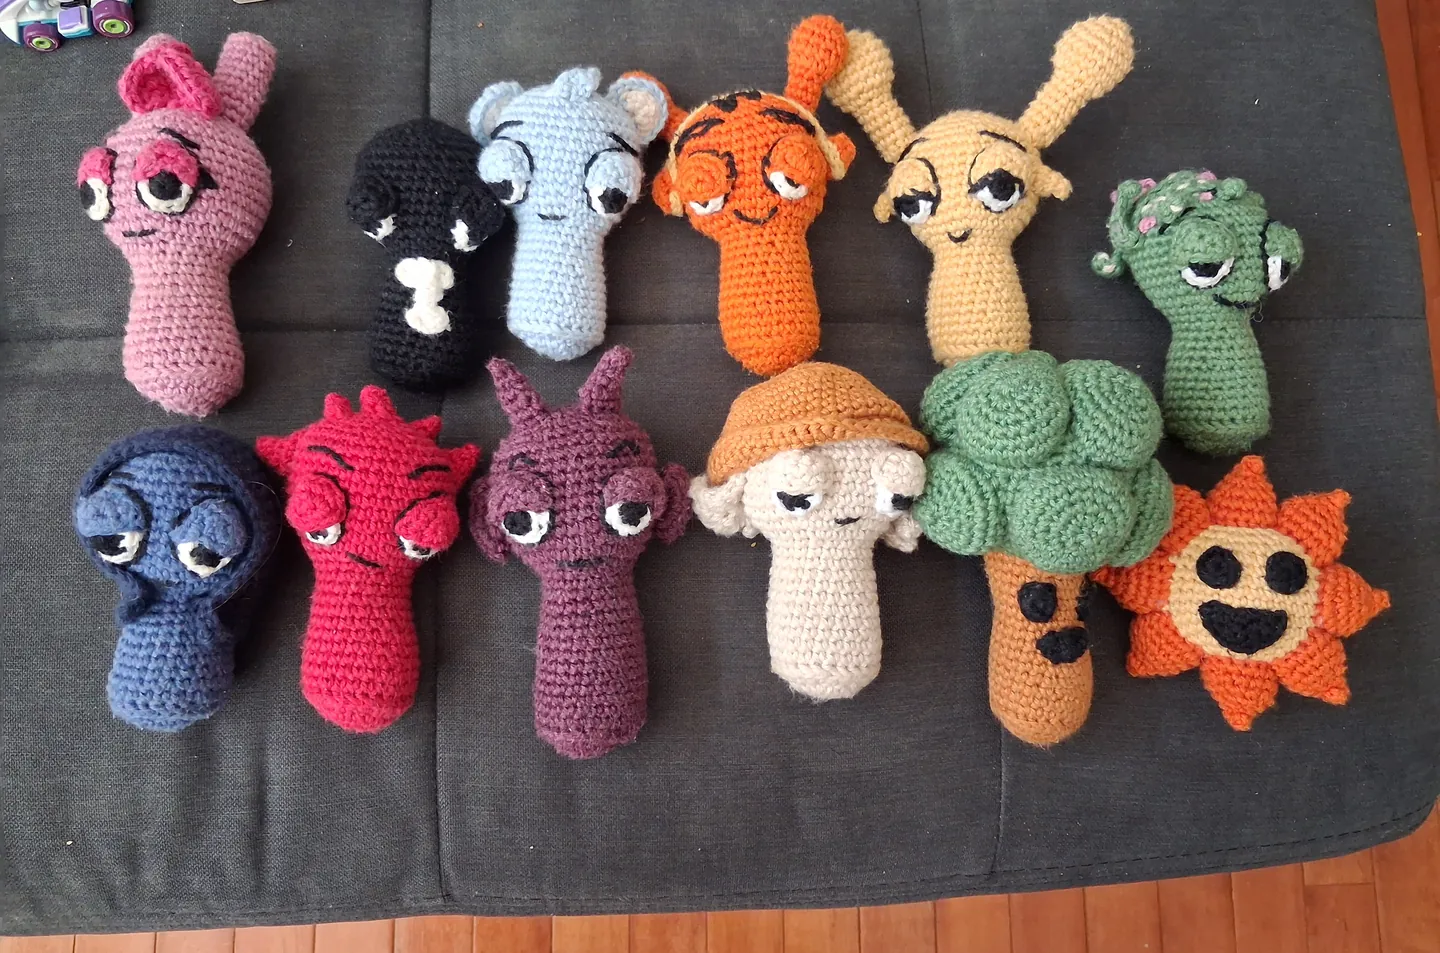
Anne R. crocheted this set for her own children, recorded her rounds in three source PDFs, and agreed to let us publish them. The charts below are her patterns, laid out one round per row so you can search them, translate them with your browser, or read a single line and put your hook down.
On this page
This page is the character half of a two-part project. The SPRUNKI crochet starting guide covers yarn, hook size, the twenty-character colour chart and finishing and toy-safety considerations. This page is the rounds themselves: a shared body and head, Mr Sun with his rays and his second face, and Mr Tree with his ten side lobes.
Patterns and finished examples by Anne R. She has read these rounds and corrected them. The source sheets and photos are Anne's. Our edited tables and explanatory text have not been independently test-crocheted. We edited the wording, put each round into a table and renumbered the parts that repeat; every numerical change is listed in the notes on the source sheets.
Download Anne R.’s original PDFs
Shared with Anne’s permission and credited to Anne R. These are the unedited files she sent, including her process photos, shorthand and blank end pages. They are separate from our edited web tables and the site’s 101-page crochet book.
- General body, eyes and eyelids — original PDF (13 pages, 17.7 MB)
- Mr Sun — original PDF (5 pages, 3.0 MB)
- Mr Tree — original PDF (4 pages, 1.7 MB)
Anne used Barroco Pima 100 cotton yarn and a 3 mm hook. Finished measurements and yarn quantities were not supplied. See the source notes before starting, and browse all family guides and crafts.
Before you start
These are fan patterns, not a licensed product: they are one maker's interpretation of the characters, and the toy you make is yours. If you post photos, the fan art page is where they belong. We have kept Anne's own wording where a line could be read two ways rather than guess for her, and each of those lines is called out below.
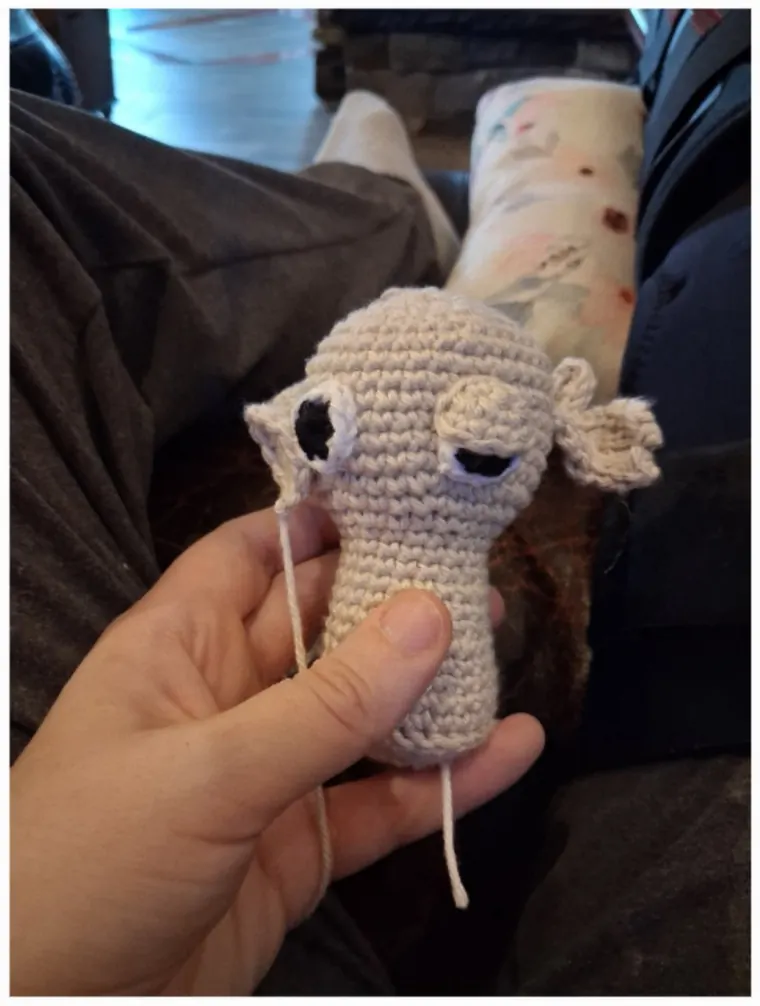
Two practical warnings from the set in the photo. The bodies are small, roughly palm-sized, so use a hook that makes a firm fabric — stuffing shows through a loose gauge and the face loses its shape. And the eyes on these toys are crocheted discs, sewn on and outlined with yarn, not plastic eyes. Sewn pieces and yarn ends still need secure attachment; crocheted features do not guarantee that a toy is safe for a baby or toddler. For a toy that goes to a baby or a toddler, read the CPSC toy-safety guidance and the parent guide.
How to read the tables
| Short form | Meaning |
|---|---|
| sc | single crochet (UK: double crochet) |
| inc | two single crochet in the same stitch |
| dec | single crochet two stitches together |
| magic ring | magic circle; the number is the stitches worked into it before pulling closed |
| (… ) ×6 | repeat everything in the brackets six times around the round |
| hdc, dc, ch | half double crochet, double crochet, chain |
The general pattern supplies a shared body and head for the humanoid characters. Mr Sun and Mr Tree have their own body patterns below. That is why the body comes first: crochet it once, then choose a character.
The shared body and head
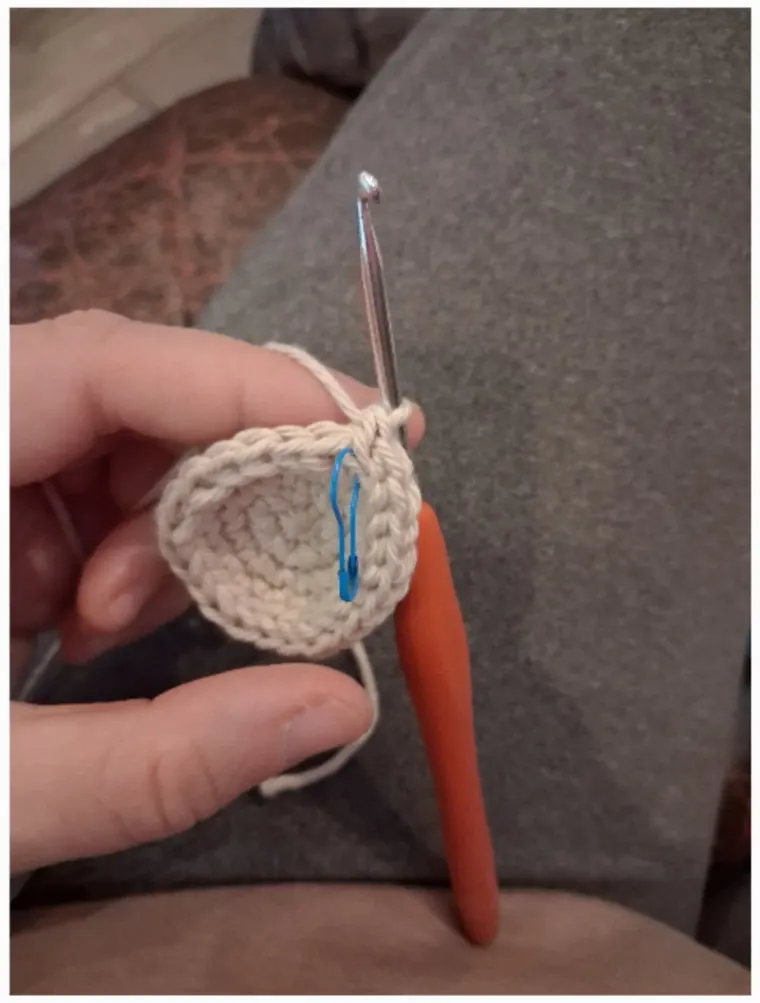
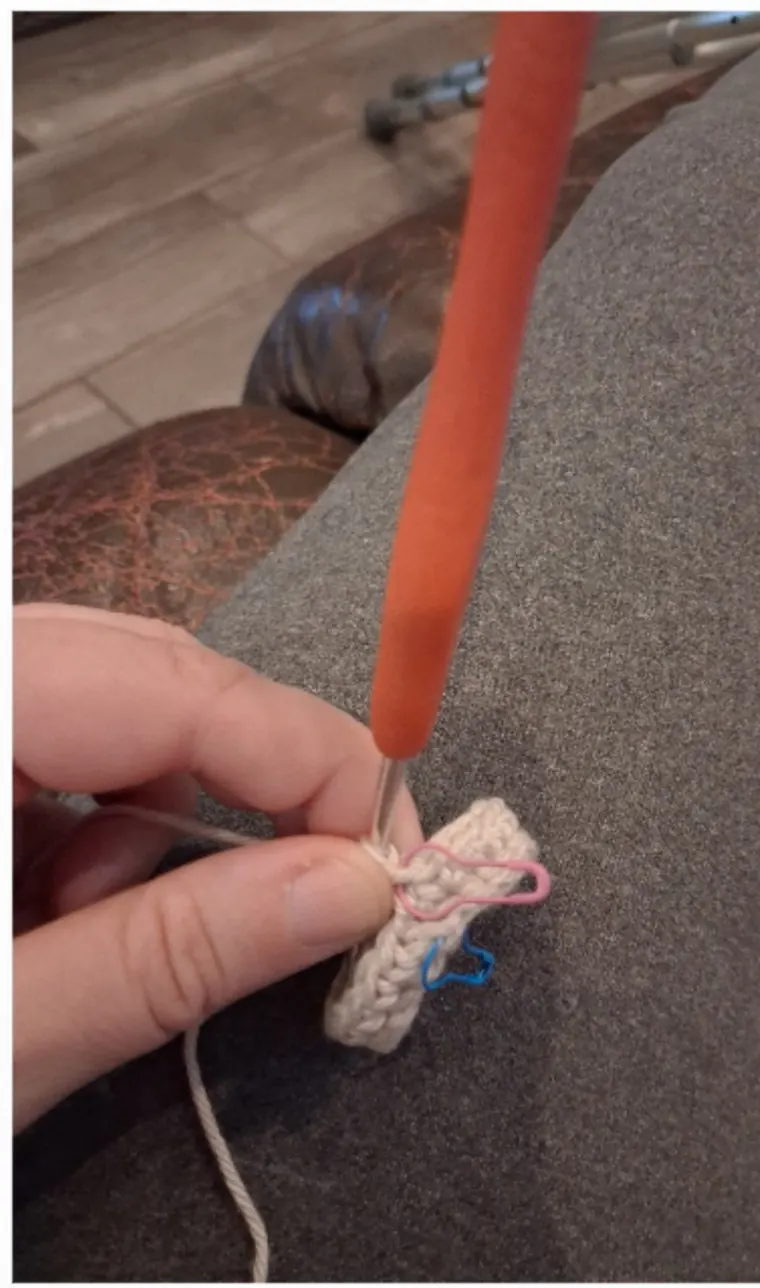
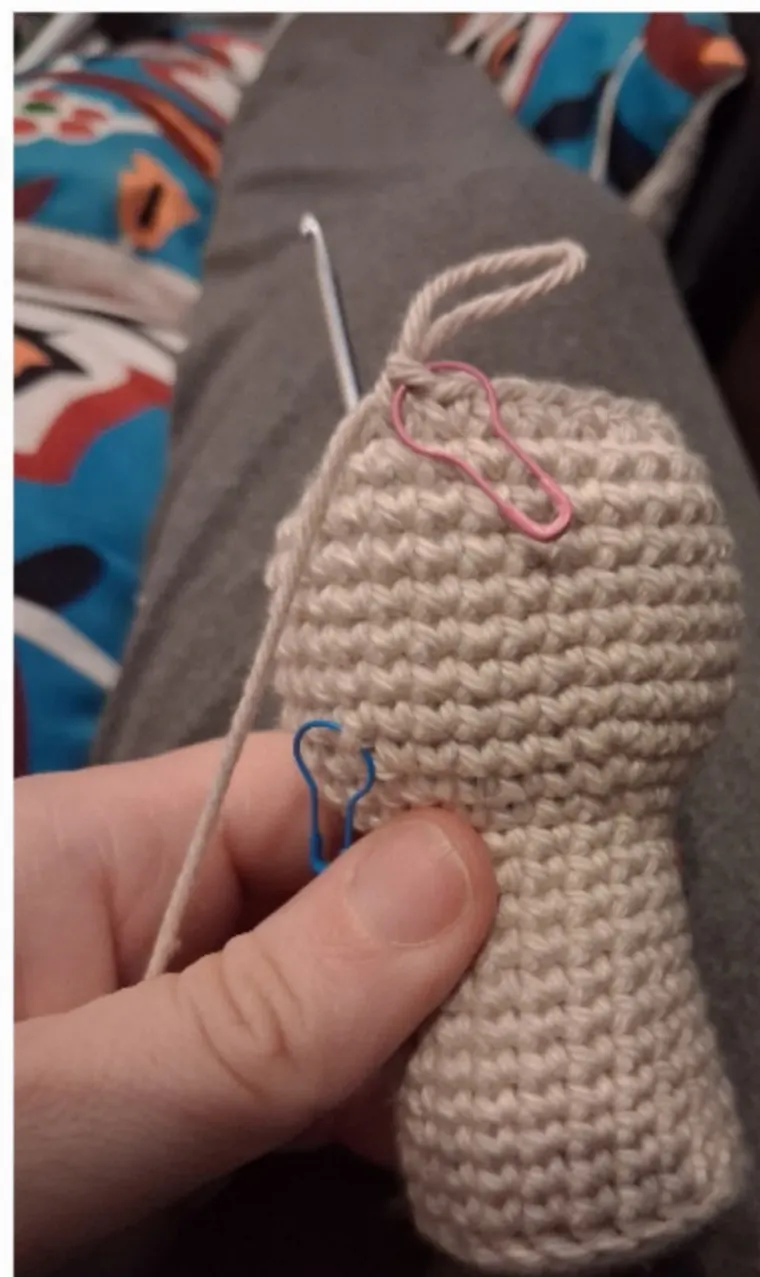
This is the piece behind most of the set: Wenda, Simon, Oren and the rest. It is worked in one piece from the top of the head down, narrows into a neck at round 15 and opens out again into the body from round 18. Mark the first stitch of every round; check each round's stitch count before moving on.
| Round | What to do | Stitches |
|---|---|---|
| 1 | 6 sc in a magic ring | 6 |
| 2 | (inc) ×6 | 12 |
| 3 | (1 sc, inc) ×6 | 18 |
| 4 | (2 sc, inc) ×6 | 24 |
| 5 | 24 sc in the inside post | 24 |
| 6–8 | 24 sc | 24 |
| 9 | (10 sc, dec) ×2 | 22 |
| 10–11 | 22 sc | 22 |
| 12 | (9 sc, dec) ×2 | 20 |
| 13–14 | 20 sc | 20 |
| 15 | (8 sc, dec) ×2 | 18 |
| 16–17 | 18 sc | 18 |
| 18 | (2 sc, inc) ×6 | 24 |
| 19 | (3 sc, inc) ×6 | 30 |
| 20 | (4 sc, inc) ×6 | 36 |
| 21–27 | 36 sc | 36 |
| 28 | (4 sc, dec) ×6 | 30 |
| 29 | (3 sc, dec) ×6 | 24 |
| 30 | (2 sc, dec) ×6 | 18 |
| 31 | (1 sc, dec) ×6 | 12 |
| 32 | (dec) ×6 | 6 |
| Finish | slip stitch into the next stitch, fasten off | — |
Rounds 1 to 4 make the crown, rounds 5 to 17 make the head and the neck, rounds 18 to 27 make the body, and rounds 28 to 32 close the base. The source sheet does not state when to add stuffing. Leave access for stuffing before closing the piece; the exact sequence still needs the maker's confirmation.
The eye disc
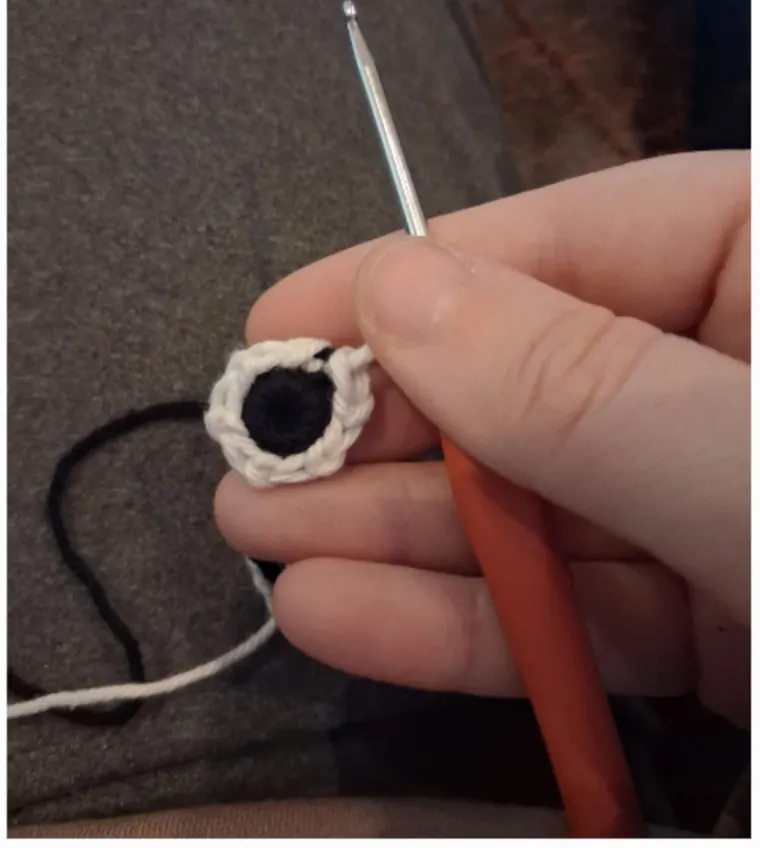
Each eye is two rounds, black first and white second, then sewn flat to the face. The source calls the second round a “slip stitch increase”. We have retained that wording and the count of twelve; its exact execution needs Anne's clarification. An ordinary single-crochet increase is not a confirmed substitute.
| Round | What to do | Stitches |
|---|---|---|
| 1 | 6 sc in a magic ring — black | 6 |
| 2 | (slip stitch increase) ×6 — white | 12 |
The eyelid
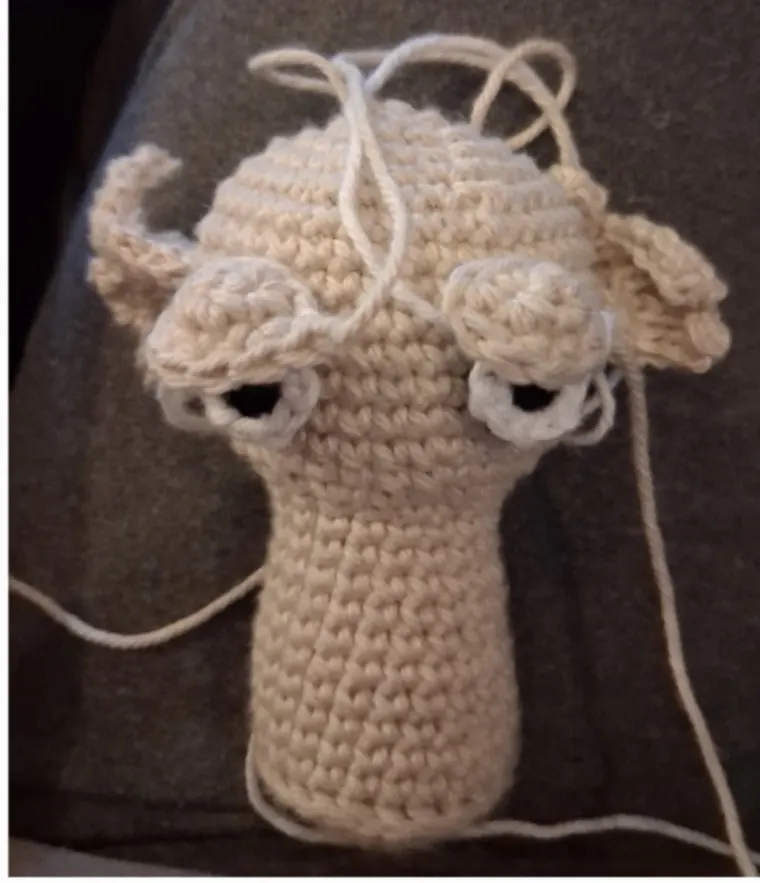
The eyelid is the small half-moon that sits over the top of the eye and gives these characters their half-closed look. It is worked from a three-stitch centre outwards and then around the back.
| Round | What to do | Stitches |
|---|---|---|
| 1 | 3 sc in a magic ring | 3 |
| 2 | chain 1 and turn, increase ×6 — source wording; placement needs clarification | 12 as written |
| 3 | sc all around the back, then (sc, inc) ×3 around the half circle | — |
The eyelid needs clarification: round 1 has three stitches, but round 2 calls for six increases and a total of twelve. The source does not explain where those six increases go. Round 3 also needs the maker's stitch-placement explanation; use the original sheet and photos as reference, not as a confirmed correction. Sew the eye down first, then the eyelid over it, then outline the eye in black yarn.
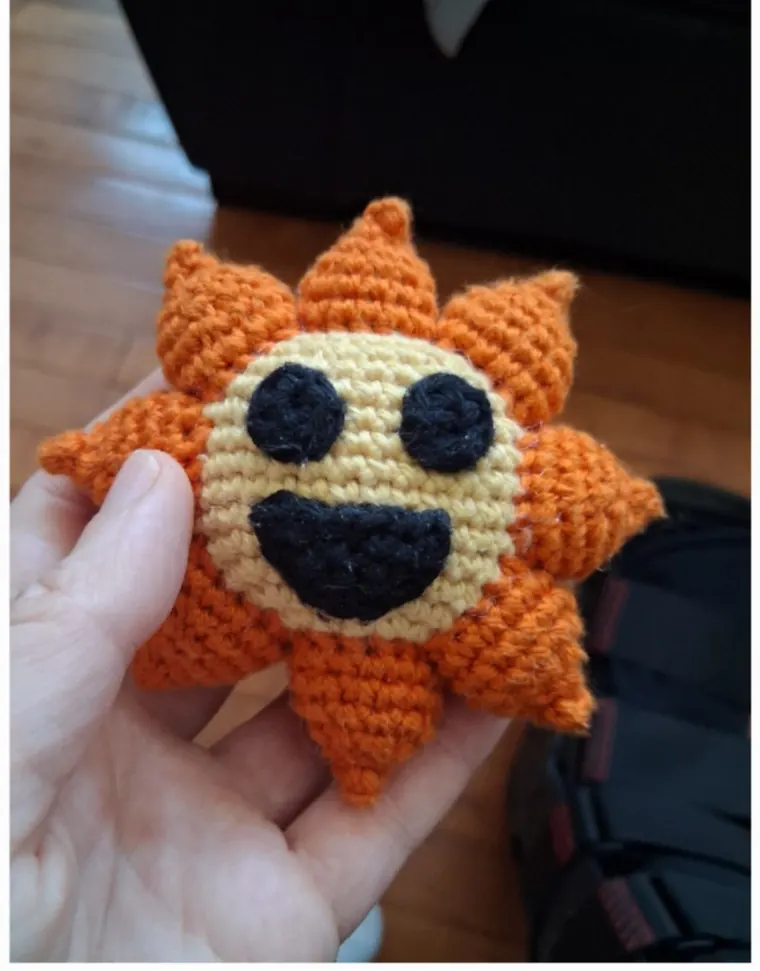
Mr Sun
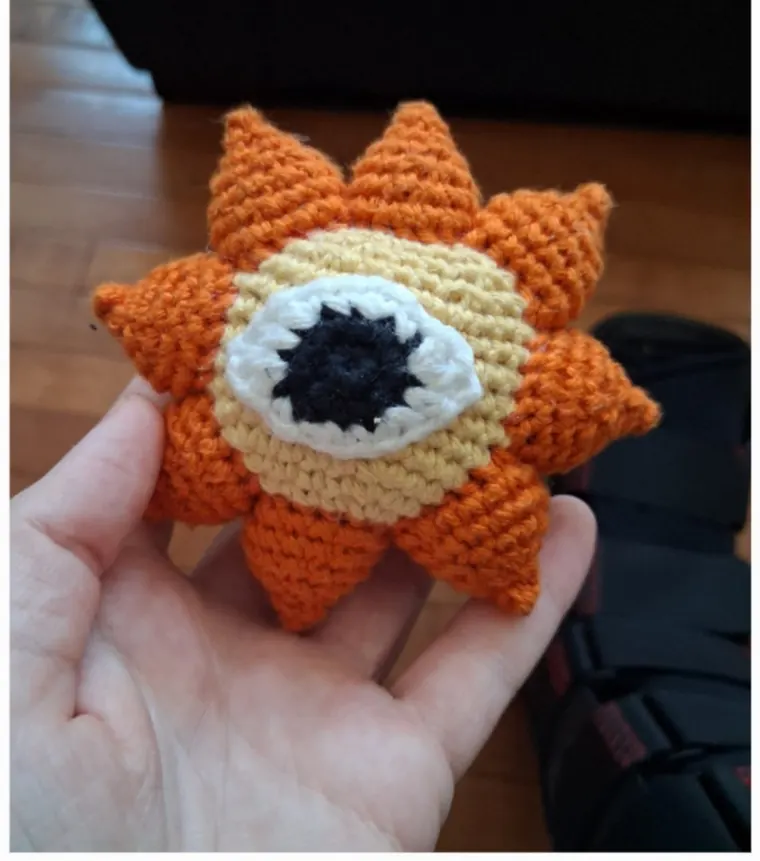
Mr Sun is a flat disc with eight rays and a face on each side: phase 1 on one side, phase 2 on the other. The body is the same six-increase spiral as the head above, closed at the bottom.
Body
| Round | What to do | Stitches |
|---|---|---|
| 1 | 6 sc in a magic ring | 6 |
| 2 | (inc) ×6 | 12 |
| 3 | (sc, inc) ×6 | 18 |
| 4 | (2 sc, inc) ×6 | 24 |
| 5 | (3 sc, inc) ×6 | 30 |
| 6 | (4 sc, inc) ×6 | 36 |
| 7–13 | 36 sc | 36 |
| 14 | (4 sc, dec) ×6 | 30 |
| 15 | (3 sc, dec) ×6 | 24 |
| 16 | (2 sc, dec) ×6 | 18 |
| 17 | (1 sc, dec) ×6 | 12 |
| 18 | (dec) ×6 | 6 |
| Finish | slip stitch into the next stitch, fasten off | — |
Rays
Each ray is worked directly onto the body rather than made separately and sewn on: pick up eighteen stitches in a rectangle on the finished body and work the ray outwards, closing as you go. Anne's samples have eight rays. Space them evenly before you start the first one, because the eight rectangles have to fit around the same circle.
| Round | What to do | Stitches |
|---|---|---|
| 1 | 18 sc into a rectangle on the body | 18 |
| 2 | 18 sc | 18 |
| 3 | (4 sc, dec) ×3 | 15 |
| 4 | (3 sc, dec) ×3 | 12 |
| 5 | (2 sc, dec) ×3 | 9 |
| 6 | (1 sc, dec) ×3 | 6 |
| 7 | (dec) ×3 | 3 |
| Finish | fasten off — the tip is too tight for a slip stitch | — |
Eyes, mouth and the second face
The eyes and the mouth are small flat pieces, not rounds worked into the head.
| Piece | What to do | Stitches |
|---|---|---|
| Eye | 6 sc in a magic ring, slip stitch, fasten off — black | 6 |
| Mouth 1 | 3 sc in a magic ring | 3 |
| Mouth 2 | chain 1, turn, 3 increases — the chain is not counted | 6 |
The source photo shows the phase 2 side as a large eye, with a black centre and a white surround. The smiling face is the other side. The white round includes the chain, half-double-crochet and double-crochet sequence recorded below.
| Step | What to do | Stitches |
|---|---|---|
| 1 | 6 sc in a magic ring | 6 |
| 2 | (inc) ×6 | 12 |
| 3a | change to white: (sc, inc, sc, inc) | 6 |
| 3b | chain, hdc, chain, dc, chain, hdc, chain — chains are not counted | 6 |
| 3c | repeat 3a and 3b once more | 12 |
| 4 | add an extra sc so the colours line up, slip stitch and fasten off | — |
The source says to add an extra single crochet to align the colours. It does not give a final count or advise dropping stitches. Sew phase 1 on one side of the body and phase 2 on the other.
Mr Tree
Mr Tree is the tallest piece in the set: a brown trunk that changes to green at round 22, widens into a canopy, and closes at round 40. The source says to crochet ten side lobes into the green part: five below and five above, offset according to the photo.
Body and canopy
Rounds 23 to 40 are written on the source sheet as stitch counts only — 30, 36, 42, then back down. The repeat patterns in that table are reconstructed with the standard six-increase and six-decrease steps that produce those counts, and they are marked as such. Test the first few rounds against the photo before you commit to the canopy.
| Round | What to do | Stitches |
|---|---|---|
| 1 | 6 sc in a magic ring | 6 |
| 2 | (inc) ×6 | 12 |
| 3 | (sc, inc) ×6 | 18 |
| 4 | (2 sc, inc) ×6 | 24 |
| 5 | 24 sc in the inside post | 24 |
| 6–8 | 24 sc | 24 |
| 9 | 2 × (10 sc, dec) | 22 |
| 10–12 | 22 sc | 22 |
| 13 | 2 × (9 sc, dec) | 20 |
| 14–21 | 20 sc | 20 |
| — | switch to green | — |
| 22 | (4 sc, inc) ×4 | 24 |
| 23 | (3 sc, inc) ×6 — the sheet gives the count only | 30 |
| 24 | (4 sc, inc) ×6 — count only on the sheet | 36 |
| 25 | (5 sc, inc) ×6 — count only on the sheet | 42 |
| 26–34 | 42 sc | 42 |
| 35 | (5 sc, dec) ×6 — count only on the sheet | 36 |
| 36 | (4 sc, dec) ×6 — count only on the sheet | 30 |
| 37 | (3 sc, dec) ×6 — count only on the sheet | 24 |
| 38 | (2 sc, dec) ×6 — count only on the sheet | 18 |
| 39 | (1 sc, dec) ×6 — count only on the sheet | 12 |
| 40 | (dec) ×6 — count only on the sheet | 6 |
| Close | close the opening | — |
The ten side lobes
Each lobe is crocheted into the green part of the finished canopy, so the join is structural rather than sewn. The exact positions and method of picking up stitches are not specified beyond the reference photo.
| Round | What to do | Stitches |
|---|---|---|
| 1 | 24 sc into the green part | 24 |
| 2 | (3 sc, inc) ×6 | 30 |
| 3 | 30 sc | 30 |
| 4 | (3 sc, dec) ×6 | 24 |
| 5 | (2 sc, dec) ×6 | 18 |
| 6 | (1 sc, dec) ×6 | 12 |
| 7 | (dec) ×6 | 6 |
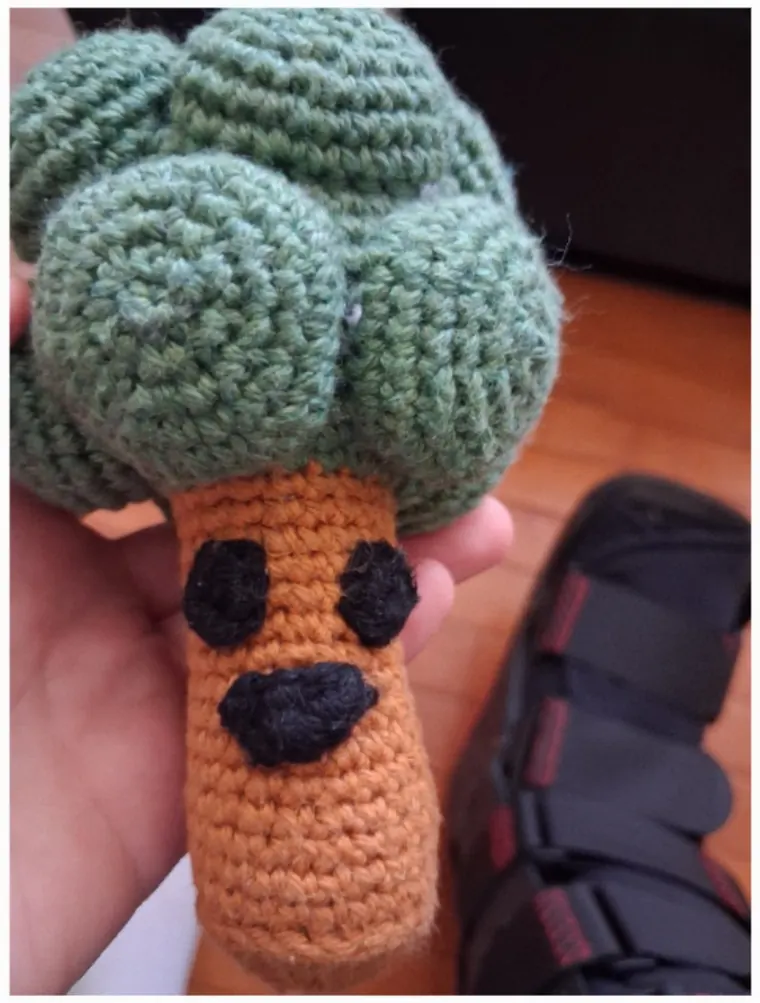
The eyes are a six-stitch magic ring each and the mouth is three stitches with a chain-one turn — the same pieces as Mr Sun, in black. The source shows the finished face but does not prescribe an assembly order.
Notes on the source sheets
These notes distinguish what the original PDFs say from our editorial interpretations. The maker made and photographed the toys and has read the rounds on this page, correcting three of them. The added explanations and the notes on placement are ours, and none of it has been test-made yet.
- Mr Sun's numbering restarts. After round 13 the sheet numbers the decrease rounds 7 to 11 again. They are rounds 14 to 18, and that is how they are printed above.
- A round is missing from the body sheet. The written rounds go from 7 straight to 9, and round 9 reduces twenty-four stitches to twenty-two. Anne confirms she skipped round 8 in the original and that rounds 6 to 8 should all be twenty-four single crochet, which is how the table now prints them. A shorter character can work fewer of those plain rounds.
- "Inside post" and "back post". Round 5 of the body says twenty-four single crochet in the inside post; round 5 of Mr Tree said the back post. Anne corrected Mr Tree's round 5 to the inside post and says this detail is optional: it gives a neat seam at the base. Keep the round at 24 stitches. The alternative stitch placement has not been specified by the author.
- Mr Tree rounds 23 to 40. Counts only on the sheet; the stitch sequences above are reconstructed with standard six-step increases and decreases. Matching the count alone does not validate the shape or stitch placement; these sequences still need a test make.
- The eye's "slip stitch increase". Kept as written. The precise stitch method needs clarification; we have not validated a substitute.
- The eyelid rounds 2–3. The source moves from three stitches to six increases without specifying placement, then describes the back and curve in one sentence. Both need clarification.
If a round does not work
Anne's photos document finished examples of her source patterns. They do not establish that our edited tables have been followed successfully. The 18 extra character adaptations in the site's printable book are separate, untested drafts.
So the useful thing to send is not "it didn't work" but the round number, the count you ended on, and what the stitch did — leans forward, covers the eye, will not lie flat. A photo of the problem says more than a paragraph describing it. Post it on the fan art page, use the contact form, or reply to the email that brought you here. Confirmed corrections can be applied to this page. The printable book is a separate edition and must be checked and regenerated when a correction affects it.
Making the rest of the set
Once the shared body works in your hands, the other characters are additions to it: the Tunner and other character pages carry the colours, and the starting guide has the twenty-character chart with the colour and the one feature that makes each face readable. If crochet is too slow for the child who asked for one, the free colouring pages are the same characters in a much shorter afternoon.
Patterns and finished examples by Anne R. She has read these rounds and corrected them. Photos and rounds by Anne R.; page layout, tables and numbering edits by sprunki.com. Questions about a round: reply to the email you got this from, or use the form on the fan art page. More Sprunki guides.
Discuss Sprunki
Which game did you play, and how did your mix turn out? Tell us below.
Loading comments…