
For fans of music creation and coding, building your own Sprunki mod using Scratch is both a fun and rewarding project. This guide will walk you through every step to create your very own Sprunki-style music mod on the Scratch platform. Whether you're new to Scratch programming or already have experience, this detailed tutorial will help you bring your creative vision to life.
Jump to a section
What Are Sprunki and Scratch?
Before you begin, let's briefly introduce these two platforms:
- Sprunki is a music-making game inspired by allowing users to create tracks by combining different sounds and beats.
- Scratch is a graphical programming platform developed by MIT, perfect for beginners to learn coding concepts and create interactive stories, games, and animations.
By combining these, you can design a music creation interface similar to Sprunki on Scratch, giving you full control over your musical experience.
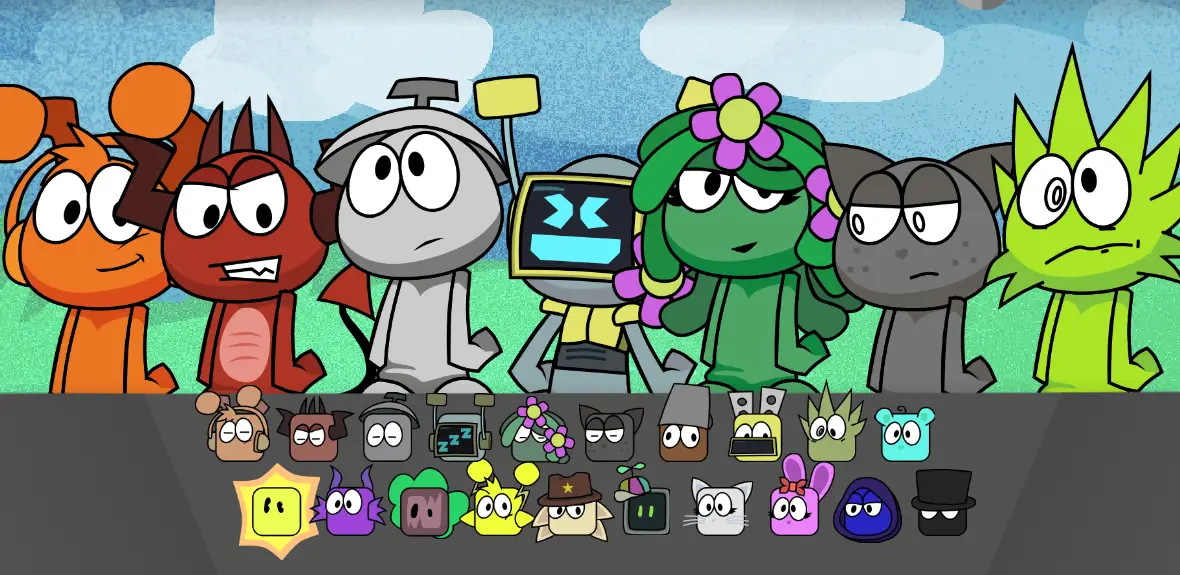
Getting Ready
Before starting your sprunki scratch project, you'll need the following tools and resources:
Essential Tools:- A computer (Windows, Mac, or Linux)
- Internet connection
- Scratch account (free at scratch.mit.edu)
- Audio editing software (such as Audacity, free and open-source)
- Basic image editing software (like GIMP or Photoshop)
- Headphones or speakers (for audio testing)
- Gather or create various audio samples (vocals, percussion, melodies, etc.)
- Design simple icon images for each sound effect
- Prepare background images and interface elements
Step 1: Set Up Your Scratch Project
- Log into your Scratch account.
- Click “Create” to start a new project.
- Name your project “Sprunki Mod” or any name you like.
- Delete the default cat sprite (you'll create your own characters).
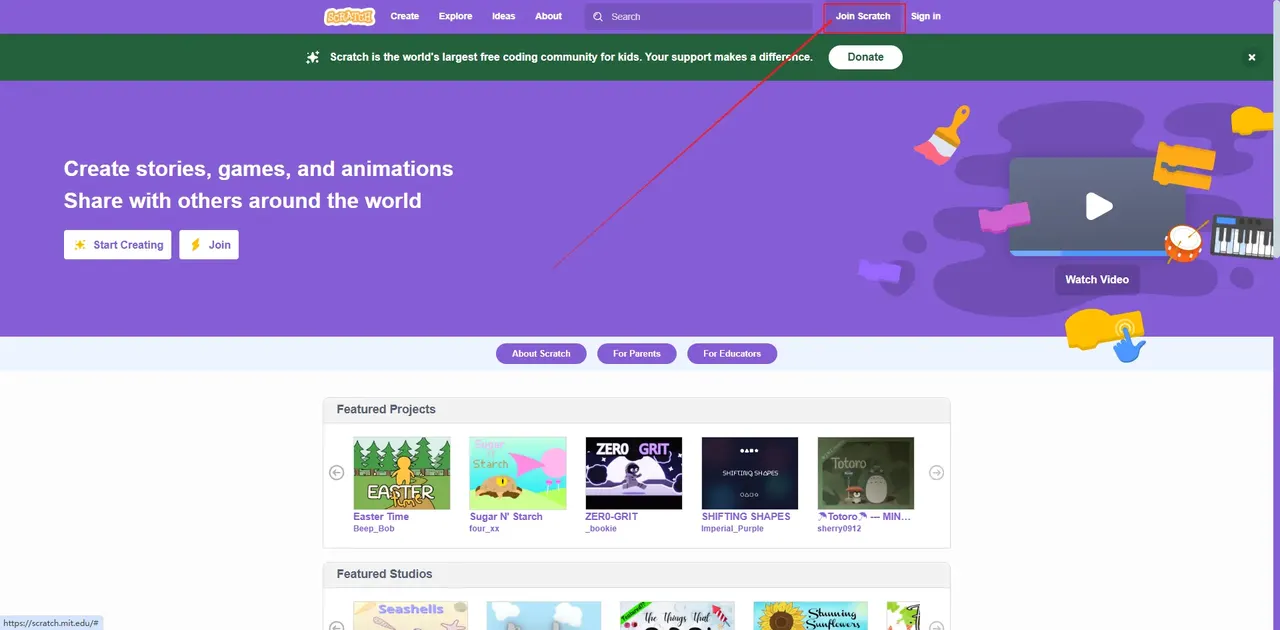
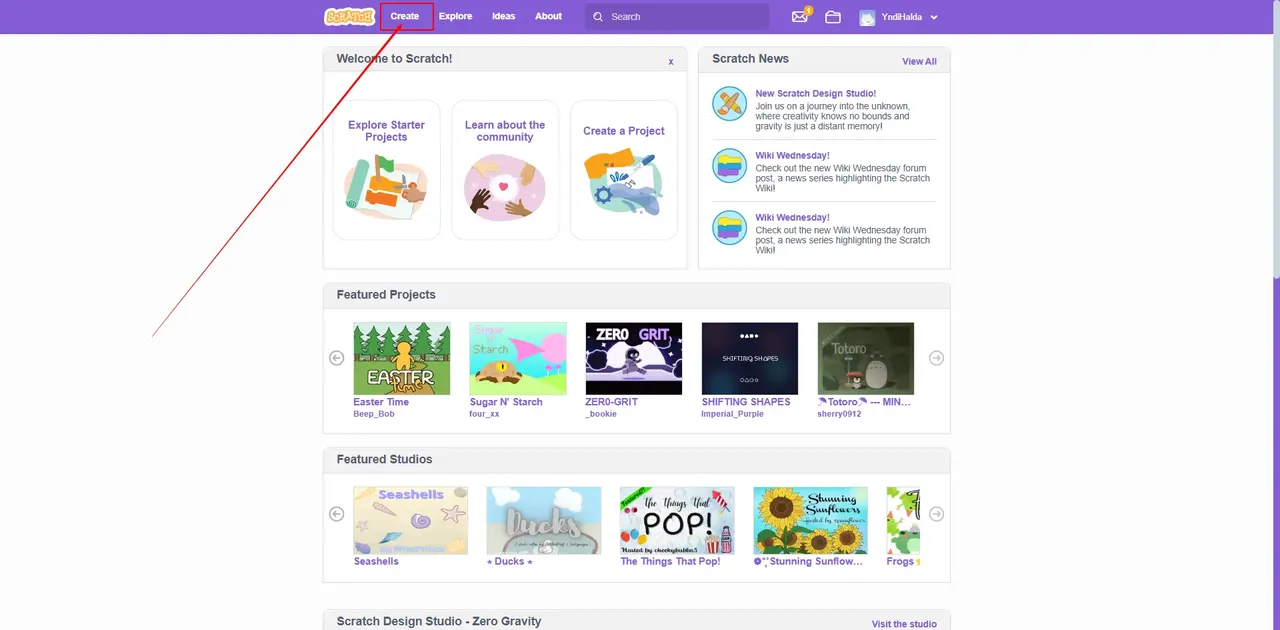
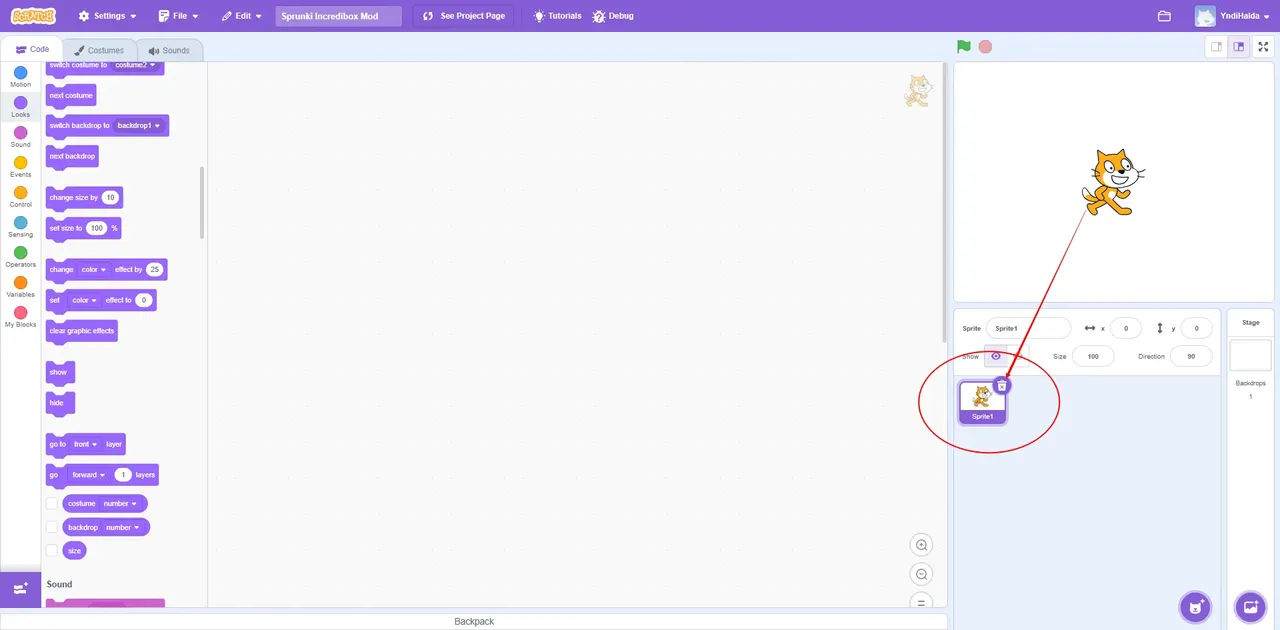
At this stage, you'll have a blank scratch sprunki project to build upon.
Step 2: Design the Interface and Background
A well-designed interface is crucial for sprunki on scratch. Here's how to create it:
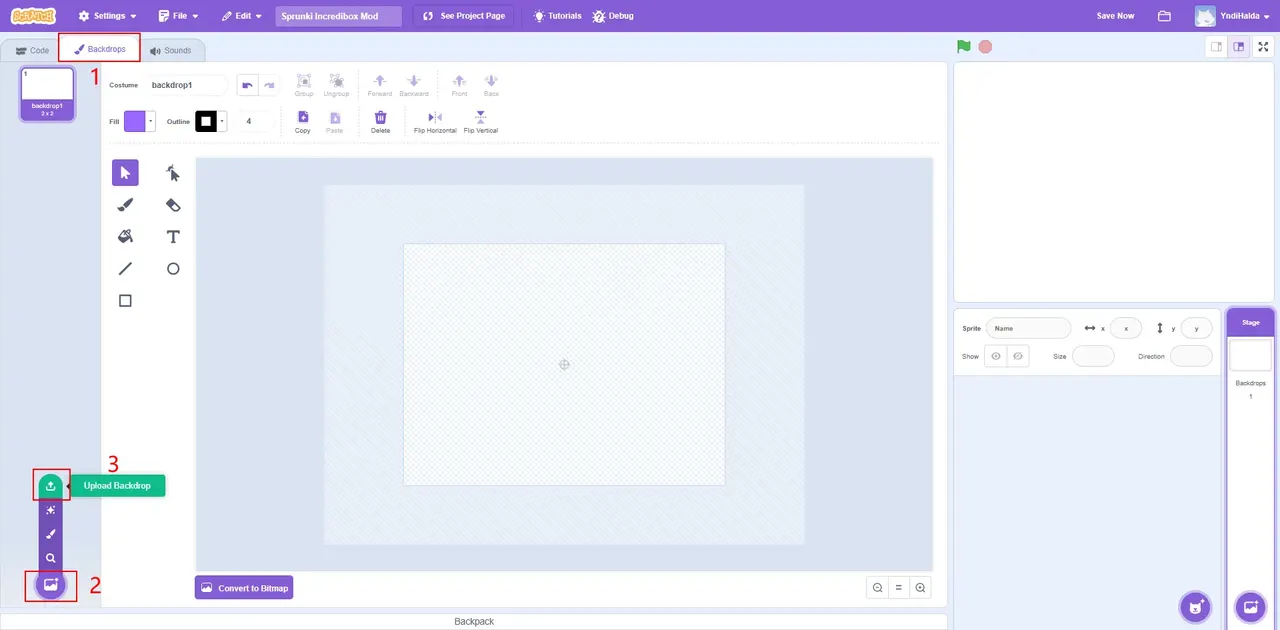
- Go to the “Backdrop” tab.
- Upload your prepared background image or use Scratch's drawing tools to make one.
- Keep the background clean and visually appealing, matching your music theme.
- Add a title and simple instructions on the backdrop.
- Use contrasting colors so elements stand out
- Leave enough space for sound effect icons
- Consider adding a control area (play, pause, reset, etc.)
Step 3: Create Sound Effect Characters
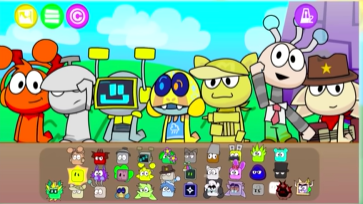
In your sprunki scratch mod, each sound is represented by a character
- Click “Choose a Sprite.”
- Upload your designed icons or create them using Scratch's drawing tools.
- Make different characters for each sound type (beats, vocals, melodies, etc.)
- Ensure each character is a good size and contrasts well with the background.
For beginners, start with 4-6 sound effect characters and add more as you gain experience.
Step 4: Upload and Manage Sounds
Now add the corresponding sounds to each character:
- Select a character.
- Go to the “Sounds” tab.
- Click “Upload Sound.”
- Upload your audio files (preferably .mp3 or .wav).
- Edit audio in Scratch as needed (trim, adjust volume).
- Ensure all audio clips are the same length or multiples of each other for seamless looping.
- Use Audacity or similar software to process your samples
- Align the start points of all audio clips
- Normalize volume levels for consistency
- Ideal clip length is 2-4 seconds for easy looping
Step 5: Script Your Characters
This is the core of your sprunki scratch mod:
- Select your first character.
- Go to the “Code” tab.
- Add scripts similar to this:
Scratch Code Example
When green flag clicked
hide
go to x: [positionX] y: [positionY]
show

When this sprite clicked
if then
  set [playing] to [1]
  forever
    play sound [sound name] until done
  end
else
  set [playing] to [0]
  stop all sounds
end- Copy and modify this script for each character, adjusting positions and sound names.
- Create a “playing” variable to track each character's state.
Step 6: Add Remix Control Features
To make your scratch sprunki project interactive, add control features:
- Create “Play All” and “Stop All” button sprites.
- Script the “Play All” button to activate all sounds.
- Script the “Stop All” button to halt all sounds.
- Consider adding a volume slider.
- Add a metronome or visual indicator to show the beat.
- Add a recording function for users to save their mixes
- Create different sound groups for style switching
- Add visual effects or animations when sounds play
Step 7: Synchronize and Test
Ensure all sounds play together smoothly:
- Click the green flag to test your project.
- Try different sound combinations to check synchronization.
- Make sure each character responds correctly to clicks.
- Adjust any unsynchronized sounds.
- Test your project on different devices and browsers.
- Use Scratch's “timer” blocks for synchronization
- Ensure all loops are equal length or proportional
- Use “broadcast” messages to coordinate actions
Step 8: Polish and Share
After finishing the basic features, do some final tweaks:
- Optimize your code and remove unnecessary scripts.
- Add clear instructions and a project description.
- Click “Share” to publish your sprunki scratch mod to the Scratch community.
- Use tags like “sprunki scratch,” “,” and “music.”
- Invite friends to test and give feedback.
FAQs
Q: My sounds are out of sync. What should I do?
A: Make sure all audio clips are the same length and use timers or broadcasts to coordinate start times.
Q: How can I make my mod look more professional?
A: Invest time in designing visuals, add animations, and use high-quality audio samples.
Q: Can I share my mod outside of Scratch?
A: Yes, you can export your project file or record demo videos to share on social media.
Q: How can I expand my Sprunki mod?
A: Add more tracks, different music styles, save features, or customizable backgrounds.
Conclusion
With this guide, you've learned how to create your own sprunki scratch mod using Scratch. This project not only builds your coding skills but also unleashes your musical creativity. Keep experimenting with new sounds and features to make your scratch sprunki project even more unique and engaging!
Remember, the journey of creation is rewarding in itself. Don't be afraid to try new ideas, learn from the Scratch community, and share your work with other sprunki on scratch fans. Happy creating!
Try Sprunki Games Now
Discuss sprunki
Loading comments…